Smoking salmon is one of the most popular and best-tasting ways to consume this amazing fish.
This guide to smoking salmon attempts to provide a stupid simple way to make great smoked salmon.
Don’t be intimidated by “secret brine recipes” or “secret methods”. Anyone can and should take on smoking salmon. It’s not hard!
You will see lots and lots of recipes and methods for smoking salmon, and sure they can create some great smoked product, but so can you, following these simple steps.
For starters, the most important factors in making great smoked salmon are the following:
- Quality salmon
- Following the simple steps of Brine->Air dry->Smoke
- Choosing the right wood
- Smoking at the right temperature
Do you notice what is not on this list? That’s right, some super secret brine recipe!
Choosing quality salmon to smoke
Hopefully, you are following along on the rest of this blog and having success catching a few salmon of your own.
While, it is true that you can pull out your “bottom of the freezer, burnt or booted up”, low-quality salmon and smoke it into tasting “better”.
The best-smoked salmon starts with the best salmon. Period.
What species of salmon is best to smoke?
King salmon, in my opinion, makes the best-smoked salmon. Coho/silver has always been a BBQ fish to me, and I’m less likely to smoke it.
Believe it or not, both Pinks and Chum (keta in the stores), smoke up well due to their oily meat.
Why does King salmon make the best smoked salmon? It all comes down to fat content.
Following a simple 3 step process
Before brining your salmon, there is the defrosting / cutting part of the process.
I like to cut mine while it’s not completely defrosted as I believe it’s easier to work with at this point.
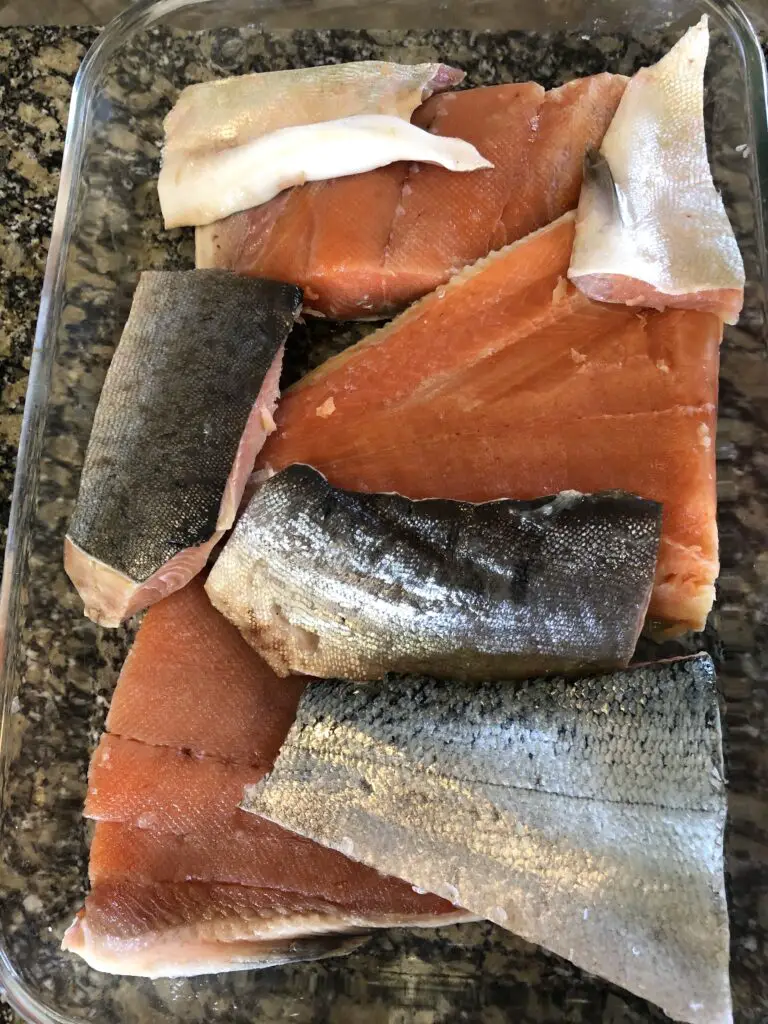
I cut these pieces up strategically such that they are around equal thickness throughout the piece of salmon.
An obvious example is the belly portion which is far thinner than the rest of the fish. I will cut this away from the main piece.
I will also cut the tail portions away as they tend to be thinner
Brining your salmon
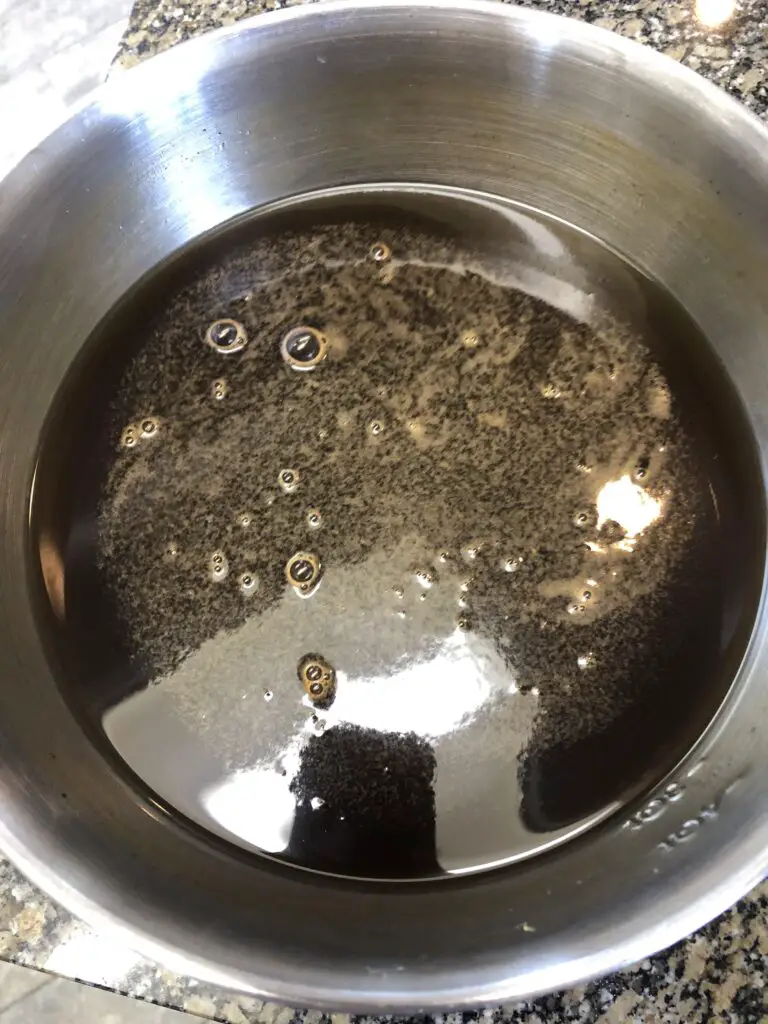
1 cup of ice cream salt or rock salt
2 cups of brown sugar
1 quart of water
3 tablespoons of tobasco (or whatever hot sauce)
The above stupid simple recipe is all you need to make quality smoked salmon.
Yes, you can improvise around this and add more salt or other spices based on taste, but this will get you into the game.
Mix the above ingredients up really good and than pour them over the pieces of salmon, make sure the salt pieces are evenly distributed
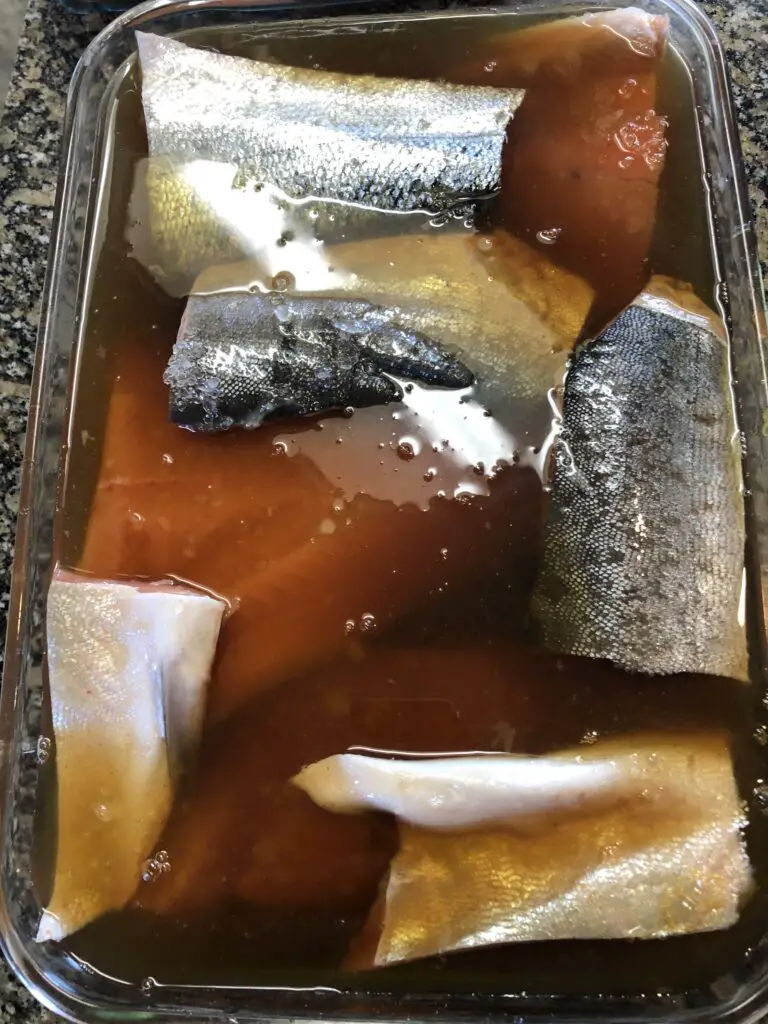
Leave your salmon pieces in this mixture, refrigerated, for at least 8 hours, but preferably 12+ hours.
I cover mine with plastic wrap and then place plates/bowls on them to ensure everything is submerged in the brine.
Air dry your salmon
When pulling the salmon out of the brine, I like to rinse it very gently with cold water to get any of the big salt chunks off of the meat.
I will then set the salmon pieces on my smoker racks on my counter to let dry. I will gently pat dry with a paper towel.
Not to completely dry the meat off, just to remove any excess water from the rinse.
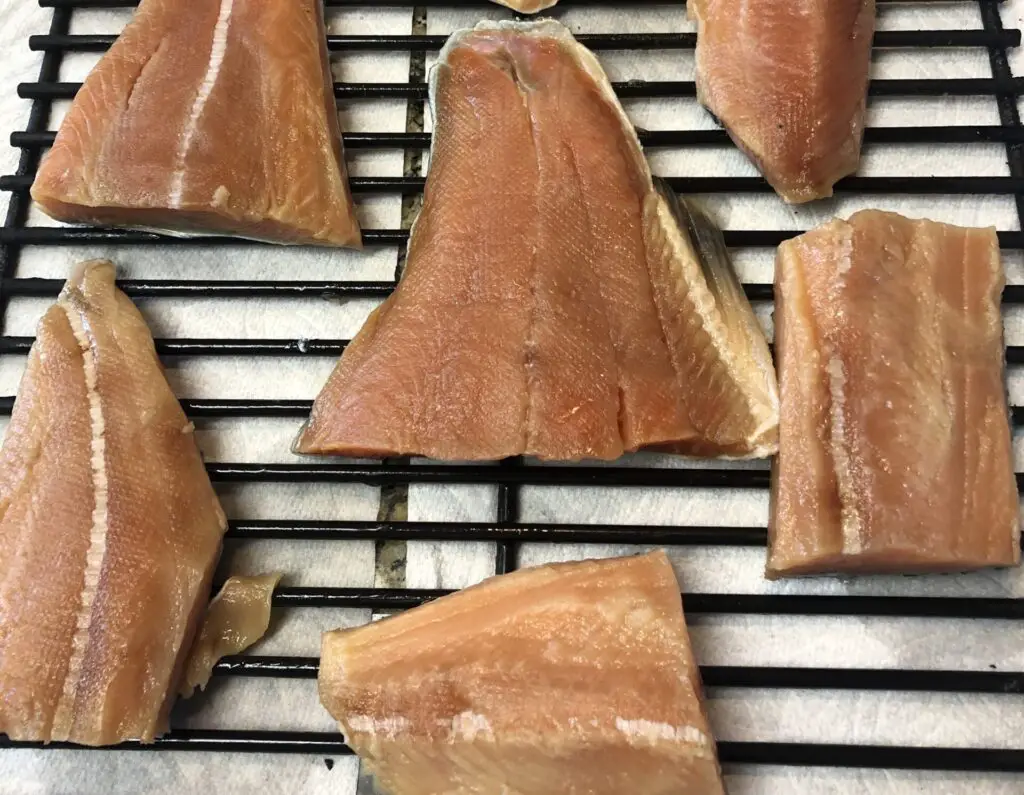
I like to let the salmon pieces air dry for at least 2-4 hours at room temperature.
Colder temps may require longer. I’m looking for a glossy finish on the meat and a tacky/sticky feel to the touch.
This indicates that the pellicle has formed. The pellicle will help seal in the moisture during the smoking process. I used to ignore this step and it just doesn’t produce the quality I’m looking for.
Always, always air dry.
I like to arrange the different thickness pieces strategically on my smoker racks. I will put the thinnest pieces the furthest away from my heat source.
Depending on your type of smoker, this may not make sense, and you may just need to remove these much earlier.
Even with my style of smoker, I end up removing these thinner pieces first.
Smoking your salmon
Okay, we’ve got salmon pieces air drying on our racks on the counter, and now it’s time to start a fire and get smoking!
I’m assuming a manual-style smoker, feel free to adapt these steps to your type.
Choosing the right wood
Typically, while my salmon is brining, I’m also soaking my wood chips/chunks (unless I have fresh green wood) in water overnight as well.
My favorite type of wood to use is alder. Followed by apple, and then maple. I love Alder. I love it when I can find a down alder tree (as I did last fall) and get free smoker wood for a couple of years.
You can also quickly order Alder smoker wood on Amazon, which is super convenient. I regularly buy these Apple Traeger pellets for my Traeger Grill to make smoked salmon as well.
It’s most annoying to go to your local home improvement store and find that they are out of the type of wood you want.
The smoking process
I start by lighting my fire with one of these chimney starters and charcoal.
My favorite charcoal for all smoker cooking is this stuff.
I will fill the top of the chimney fire starter with charcoal, use paper in the bottom to start it, and then wait until the coals are hot enough to emit a visible flame.
At this point I will dump the burning coals into my firebox. I let the temp go up to whatever it will hit, and then come down to about 175 before I add my racks back in.
I will than add my smoker racks back to the smoker in the correct positions (thin meat furthest away from the firebox)
Followed by adding my first wood chunk. I will add this to the edge of my coals vs right on the middle as they are starting a bit hotter at 175 and I want a nice steady slow smoke vs flames and heat.
I want my smoker temp to read 150 most of the time. If it dips much below 150, I will add a few more coals. If I’m out of smoke, I will add more wood pieces. This may take some practice to get right. Just keep an eye on it.
If you have a manual smoker, this ThermoPro device helps you be untethered from your smoker, but still keep tabs on the temp readings so you can respond and adjust when needed.
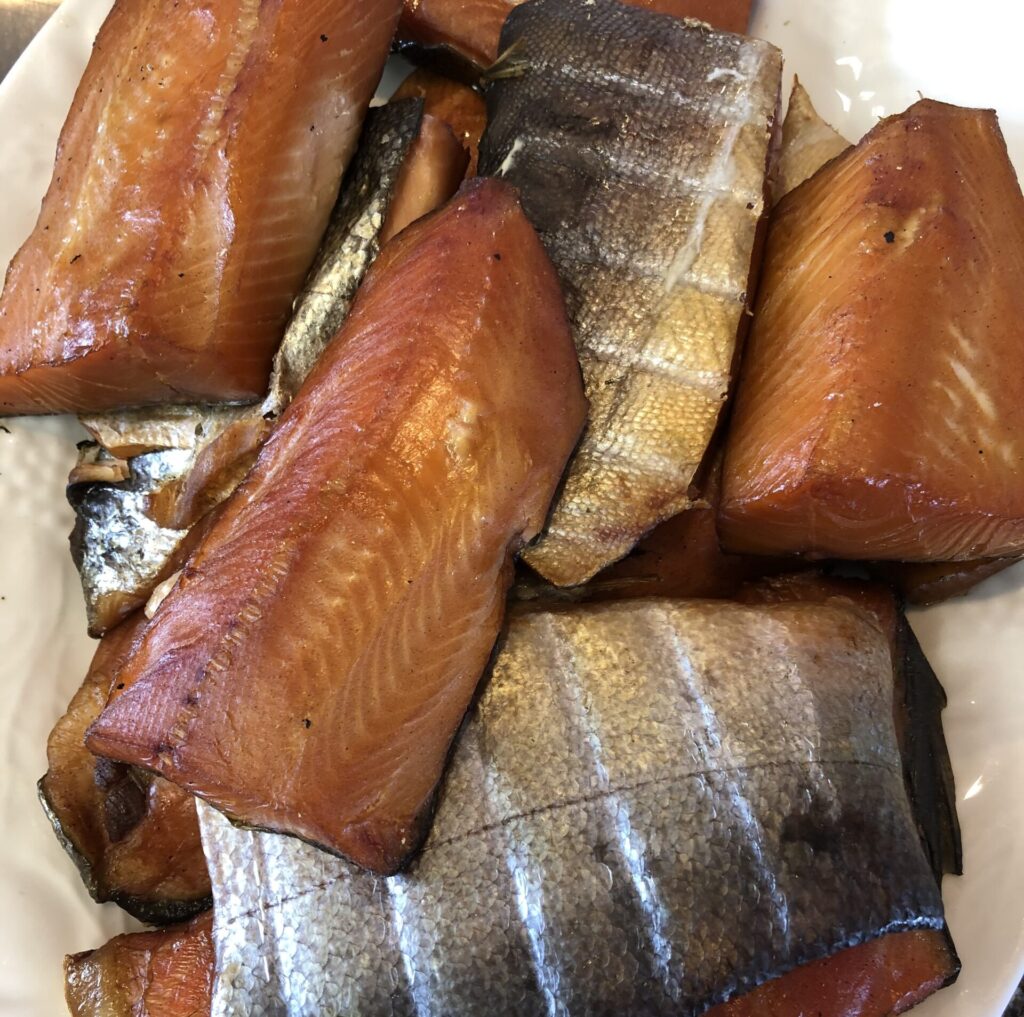
The finished product
If you’ve followed these steps, your smoked salmon should be done in about 3-4 hours.
So how do you know when it’s done? Well…each piece may be done at different times based on thickness and preference.
Also, smoker style plays a role here. If you have even heat, it may only take 2-2.5 hours for your belly meat to be done.
If you have one side that’s hotter near the firebox, it may take 3 hours for the belly meat to be ready.
Regardless, a done piece of smoked salmon will be firm-ish to the touch.
When picked at, it should be flakey vs mushy. It may also have some white fat bubbles appearing on it.
Unless it’s a really big piece of salmon, a temperature probe is generally not necessary. I’ve never used one as I’ve cooked so much salmon over the years and generally use the touch test.
One of my favorite things is to eat that belly meat right when it comes off the grill. So so good!
My dog Felix gets to eat the skin. He will do anything for a piece of smoked salmon skin.
Let the smoked salmon cool off a bit before putting it into the refrigerator. Good luck and as always, please let me know if you have any questions. I would be happy to help.
Looking for more great salmon recipes/cooking ideas? Check out our comprehensive page on the best way to cook salmon.
I am using your method. I am from Seattle, grew up on Salmon, but no where else has it ever tasted anything like ours. I last smoke when I was a kid so I don’t remember how to do it, but I have plenty of salmon and bought a grill/smoker for now. Gonna build a full size smoke hut next year. I appreciate your article and got right to the point and particularly the recommendations of wood and supplies. I was able to walk into Lowe’s and get everything I needed.
Audrey,
Thanks for sharing this feedback! I’m glad to hear you’re having great success!
-Kyle