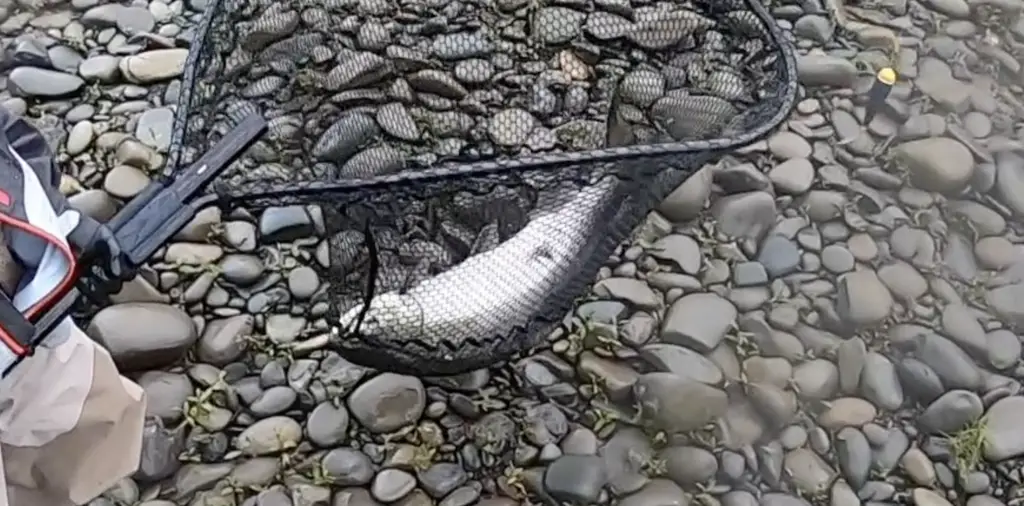
Float fishing is one of the most effective and popular techniques amongst serious salmon anglers.
You can avoid getting hung up on the bottom, keep your offering in the strike zone longer, and more effectively fish prime holding water compared to other methods.
Detailed how to video for float fishing for king salmon
If you prefer the Video format the above video will cover what you need to know about float fishing for salmon
The float fishing cast
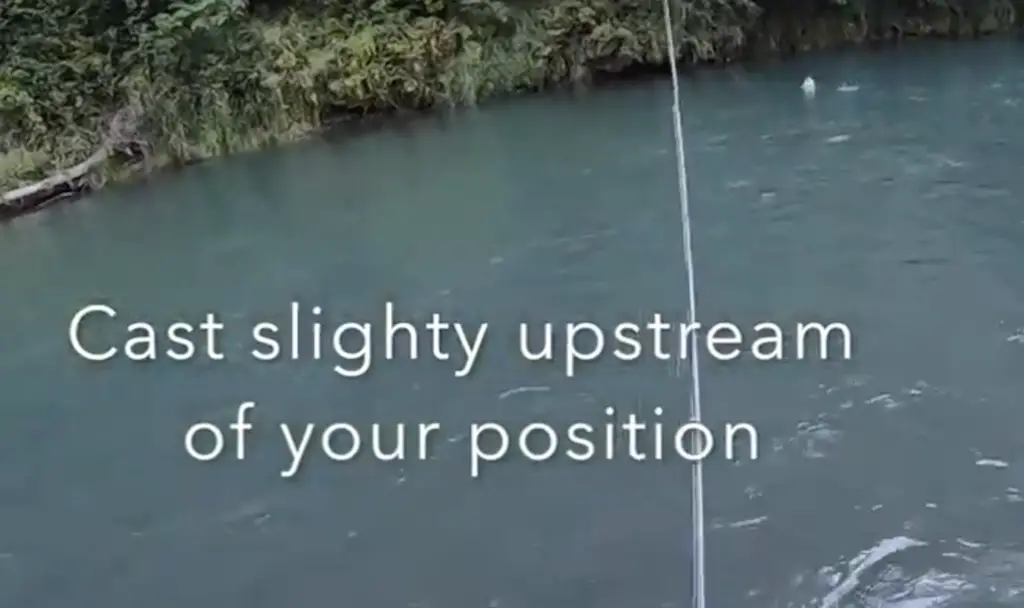
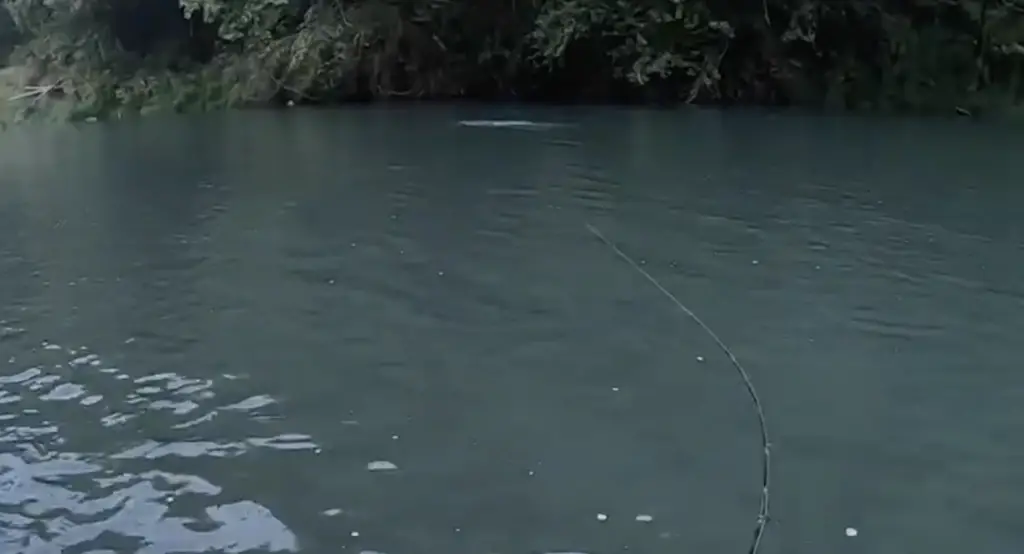
Assuming the water is flowing from left to right in the below examples leveraging clock terminology.

Typically, you will cast upstream to about 11 o’clock to start the float fishing drift.
It’s important to pick the appropriate spot on the drift relative to where you think the fish are concentrated. You want the fish you are targeting to be slightly downstream of you, but closer to 12 o’clock or directly in front of you.
The idea is to get fish to bite where it is easiest to hook them while float fishing.
As soon as your float hits the water and starts to move downstream, you have three things to manage:
- Starting to reel in slack created by the float moving towards your position
- Keep excess line from pulling the float downstream faster than the current
- Avoid affecting or jerking the float while doing #1 and #2
#3 above is what separates the novice float fishing angler from the experienced one. This is why a longer rod is helpful as well.
As the float begins to pass your position (12 o’clock) and move downstream, you need to keep your mainline behind the float by mending your line.
This is accomplished by a careful lifting of the rod tip and moving the line upstream gently so as to not disturb the float or move it off its track in the drift.
You also want to keep feeding your float line so that it continues the drift downstream.
If you close your bail and have no slack out, your leader and terminal offering will immediately rise to the surface and you will no longer be fishing, as the fish tend to be in the bottom third of the water column.
There is a technique where you pull back on the float intentionally, and very briefly, to slow it down and cause a rising of your offering in the water column, followed immediately by letting the float go so that your terminal offering sinks again.
This can help navigate a shallow rise in the drift, help navigate a faster section of water, or even produce a strike from a salmon in some cases.
As your float continues the journey downstream, it’s super important and vital even to pay attention to what the float is doing and interpreting that to inform your next cast.
If you have rigged your float with the correct amount of weight, it will be standing straight up in the drift.
If this is the case, but your float is now pointing forward or downstream, this is an indication that you’ve hit bottom or that you are dragging bottom.
You would then retrieve your cast and adjust your bobber knot stop to be closer to your bobber, so as to shorten the depth of your overall presentation.
Because float fishing for salmon always involves… a float with some amount of mainline between your rod tip and your float during a cast, it’s vitally important to have a long enough rod to perform the line mending activity commonly associated with a float fishing cast.
Let’s get rigged up for float fishing
Best fishing rod for salmon float fishing
The starting point of the float rod discussion is really a 10’6″ rod. Yes, you can get by with something smaller, but in most conditions, a 10’6″ or longer is where you want to be. You also really really want to have a casting reel on that rod.
I prefer a casting rod for float fishing for salmon. I’ve caught so many salmon on my favorite 10’6 float rod (no longer in production).
We are an Amazon affiliate, so you are supporting our site by using our links, though it’s the same price regardless of how you shop.
Best casting reel for salmon float fishing
The technique in managing your float drift requires constant release of line and line management.
You want this to happen with a press of a button with your thumb, and the ability to “close the bail” by a simple crank on the reel handle.
Often times when your float goes under (when a salmon takes your bait), you are in the middle of a line management activity and you want the ability to reel down on that fish with the least amount of drama possible.
Yes, you can still do all of this with a spinning reel, but you will not hook as many salmon as with a casting setup.
The Shimano Curado casting reel is what I will typically pair with my casting rods. A great low-profile casting setup that is high quality and affordable.
There are still a few advantages to a spinning reel in certain situations.
Fishing the terminal area of Barrier Dam for spring chinook salmon may require making a cast of 100+ feet with a 12’6″ rod and a spinning reel.
Targeting summer run steelhead in heavy cover may require casting from odd angles that favor a spinning reel over a casting setup as well.
If you are a spinning reel purist though, seriously consider making the switch. Most salmon fishing conditions will favor the casting setup for successfully hooking salmon. It’s not that hard to learn and adjust to.
Best mainline for float fishing for salmon
Okay, so you have a 10’6″ rod and a nice casting reel to go with it. You need to spool that reel with braided line.
This isn’t just about spool capacity and line strength.
Braided line floats, and it’s vitally important that your mainline not only float, but provide as little drag effect on your float as possible.
When float fishing you are trying to entice a salmon to bite, and that happens best when your float is moving slooooowly.
If you just chuck your float out there and don’t mend your line, or you cannot mend easily because you are using mono mainline, and thus your float is steaming downriver, you will hook far fewer salmon.
I like to use 30 lb braid, but you can go higher than that as well. I go with high visibility stuff as it really helps to see your mainline clearly.
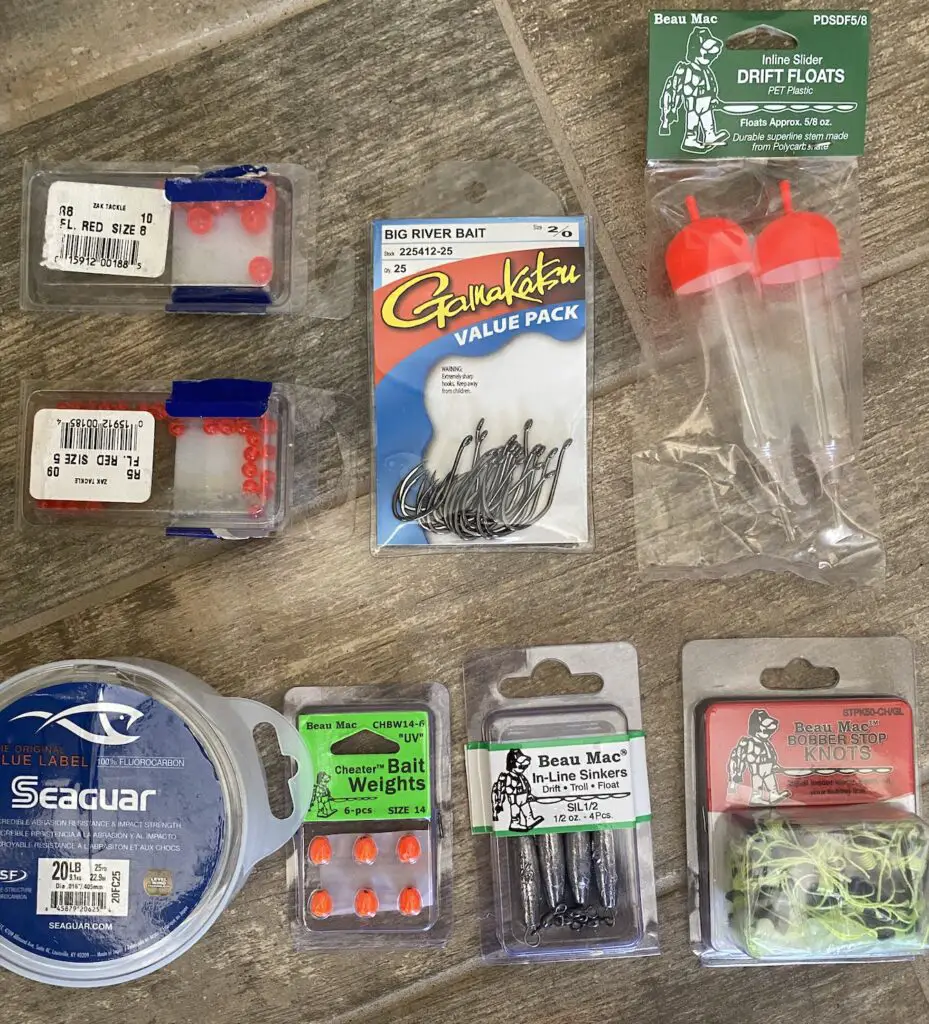
Float fishing for salmon tackle
The first thing that goes on your mainline is a bobber stop knot.
Most of the time, this knot comes pre-tied with dacron material on a plastic tube that you can slide up your mainline.
Make sure you slide the knot up your line off of the plastic tube and then tighten it down and cut the tag ends down.
The next piece of tackle is a small bead that will not slide over the knot. Followed by a float of some sort.
The float will slide up your mainline until it hits the bead which hits the knot. The knot should slide with effort up or down your mainline to control your depth.
If the knot slides too easily, you will need to really pull on the tag ends until it requires effort to move it.
After sliding the float onto your mainline, you should slide a larger bead below it to protect your knot and then finally tie your mainline to an inline sinker which matches the float weight rating.
All floats are rated with a given weight. This is super important.
If your float is a 1/2 float, you should use a 1/2 oz inline bobber weight.
This ensures that your float will stand up straight in the drift.
Finally, you should tie a fluorocarbon leader from the other side of the inline weight to your hook. The leader length is a function of water depth and clarity. T
here are places I fish with 2″ visibility due to glacial silt where I use 12″ leaders and catch king salmon in 18″ of water. There are also rivers with 5 ft+ of visibility where I use 30″ + of leader.
In situations of extremely reduced visibility or very slow water, I will also use a bait weight on my leader to ensure that I know exactly where the bottom is.
In other situations, I may use a split shot 9-12″ above my hook. Sometimes I use no weight on the leader at all, it all depends on a number of factors including water clarity, time of day, and current speed.
Float fishing strategy
When I encounter a new drift, where I have no idea what the water depth is, I will generally start out fishing a target depth above the bottom based on an educated guess.
Let’s say I start with 3 ft from the bobber stop to the terminal offering. After each few casts, I will slide my bobber stop up by 6″ to increase my depth.
At some point, I will find the bottom. Once my float tilting forward indicates that I’ve encountered the bottom, I will then adjust to be shallower by about 4-6″.
Salmon only see forward and up, not down and I want to be fishing just above the bottom to put it right in front of their faces or slightly above.
If you are fishing for salmon all day without a bite and you haven’t found the bottom, it’s possible you have been fishing too high in the water column.
In some rivers that I fish with glacial silt during the summer, the visibility is only about 1-2″. I can still hook salmon constantly in these conditions with float and eggs, but only if I find the bottom and then come up slightly.
Don’t assume you know how deep the water actually is.
Find it with your float fishing setup and strategy!
The float fishing bite
Thankfully, this is much less complicated than drift fishing, which is one of the major advantages of float fishing for salmon.
Float goes down, you swing your rod back violently and now you’ve hooked a fish, right? Not so fast!
There’s an adage you need to memorize and repeat to yourself often: “Reel till you feel.”
The first thing you need to do when that float goes down is reel like your life depended on it.
If you set the hook right way, there’s a really good chance that you have too much slack line in the water and you will only take up that slack and not hook a fish.
Sometimes, when your float goes under, you are really just on bottom, or a fish has grabbed it and immediately spit it out again.
If you swing with wild abandon, there’s a good chance you will be falling on your backside to the amusement of anyone in the vicinity.
I’ve seen it happen quite a few times. Don’t be that guy or gal!
Another consequence of swinging and missing? Your bait is now gone as well. So reel until you feel the fish and immediately set up on the fish at that point. You will miss far fewer fish, and fish way more effectively if you follow this procedure.
If performed correctly, the entire reel and hookset will only take a split second. It will become second nature to you at some point, but it takes some getting used to.
One of the keys to hooking fish while float fishing, or any type of fishing for that matter, is really sharp hooks.
If your float is going down and you aren’t hooking fish, it’s possible that your hook has gotten dull, making it super easy for that fish to spit it out.
What we are talking about is sticky sharp.
The kind that you stick in yourself by accident because they are so sharp. How can you tell if it’s sharp enough? I will often use the thumbnail test.
Apply gentle pressure to the shaft of the hook with the point on your thumbnail. If it slides, you need to replace or sharpen the heck out of that hook. If it sticks in, with almost no pressure, that’s a good hook that will um, hook some fish.
Float fishing terminal offerings and bait
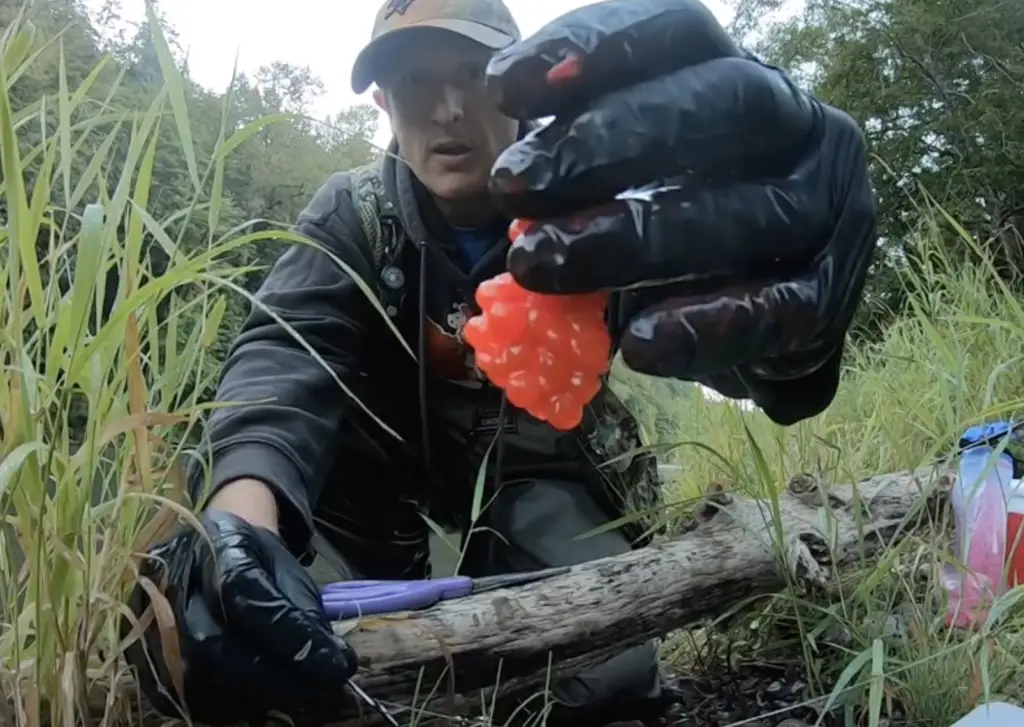
When I started curing my own salmon eggs, my catch rate increased dramatically. Fishing cured salmon eggs under a float is the best way to target biting salmon in the most conditions.
There are some species-specific factors to consider.
Sometimes coho salmon can be finicky about biting eggs, though it’s one of the best methods I’ve seen in most conditions, especially on odd years when the pinks are spawning in the river.
Pinks will typically not bite eggs. Kings, on the other hand, cannot resist a good glob of properly cured eggs.
Fishing a jig under a float tipped with a bit of raw prawn can be a great way to target chum, pinks, and some coho salmon.
Some rivers that have both chum salmon and early returning steelhead can be effectively targeted fishing with the float/jig/prawn combination.
Want to switch it up? Put a single 14-20mm red soft bead under a float and watch what happens!
Egg curing is more about proper handling than any specific cure. While there are certain cures that get really dialed in for a given river and there are people out there with secret cures that are deadly…
Don’t be intimidated by this!
Anyone can go down and buy an egg cure off the shelf, follow some simple instructions, and start slaying salmon with their own eggs.
In fact, I still only use two different cures that are largely just what I buy off the shelf and I do quite well. The video below will help you cure your own eggs
To summarize:
- Take an egg collection packet with you to the river (ziplock and paper towel)
- Always bleed fish immediately after catching
- Keep fish cold
- Remove eggs during gutting process and place on paper towel, place paper towel in ziplock
- Keep eggs cold
- Cure within the next 48 hours follow above video
Struggling to get hens to start curing eggs with? Refer to the section on flossing salmon…ok just kidding!
If you live in the Pacific Northwest, find yourself some Rays Bait eggs, add a little bit of Pautzke’s firepower krill to that, and fish with confidence.
Seriously, those will fish great. Not as great as your own stuff, but they will hold their own and sometimes even outfish other cures.
You can also buy uncured salmon eggs sometimes, but be careful to inspect the quality of these eggs.
I’ve bought salmon eggs from the natives on fish they’ve netted, and not bled properly. Or I’ve accepted donated salmon eggs from other anglers who didn’t follow the above 6 steps.
If there’s a lot of blood in the eggs, or they have a funky smell, just pass on them. What is the point of fishing eggs you don’t have confidence in? Just a big waste of time.
Want to learn about other methods of targeting salmon in rivers? Checkout our complete reference to salmon fishing in the rivers of the Pacific Northwest.