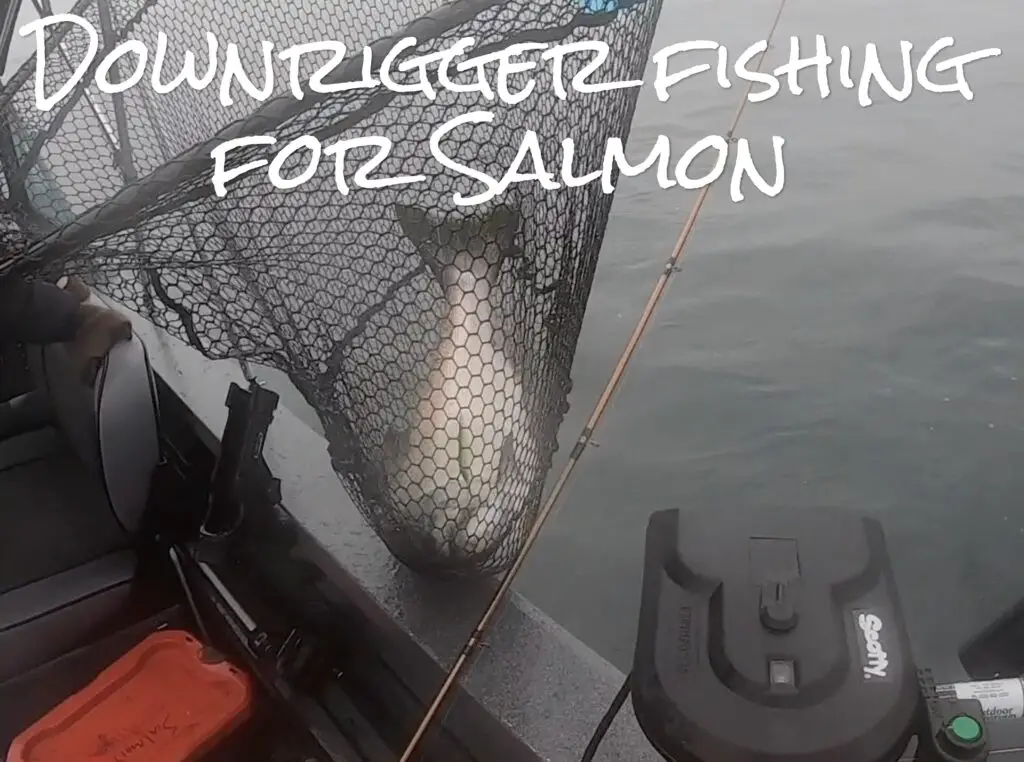
Downriggers are these awesome devices that allow you to troll for salmon with a very heavy lead weight (downrigger ball) that will release from your line when a salmon takes the trolled offering.
Don’t be intimidated by the learning curve of trolling with downriggers!
They are not that difficult to master. And if you are trolling for salmon in open water, there is no technique more effective and more popular than downrigger fishing.
How to use a downrigger to hook salmon
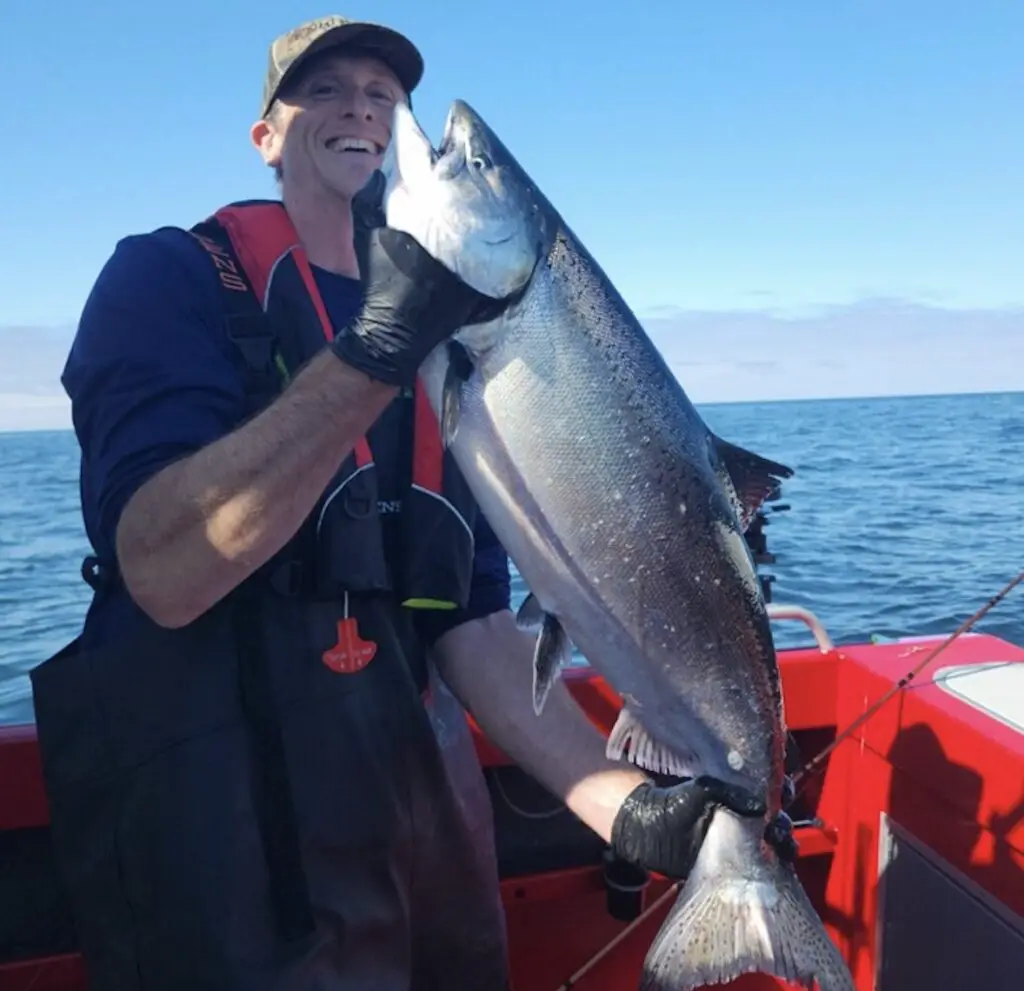
Let’s get right to the meat of why you are likely reading this amazing blog page. How do you actually use a downrigger to hook salmon?
Let’s start by thinking about what problem a downrigger is actually solving: When trolling for salmon, we are attempting to travel at a particular speed and get our gear down to a particular depth.
If you were to troll 1 ounce of lead at 2.5 mph, 60 feet behind your boat, how deep would your gear be?
If you answered “not very deep”, you get an A for the day!
Now answer the same question but substitute 1 lb of lead. We are finally getting somewhere! However, we now have another problem…
- What type of fishing rod do you envision handles 1 lb of lead with 2.5 mph of water drag on it? If you answered something like “Halibut / Tuna rod”, again give yourself a gold star. Or maybe research the term “meat line”.
- We still aren’t as deep as we would like to be for most chinook salmon trolling which happens commonly 40-120 ft down in the water column.
So now you could decide to troll for salmon with a super heavy rod with lots of weight or look at completely different ways to fish for salmon such as mooching or jigging.
Enter the downrigger!
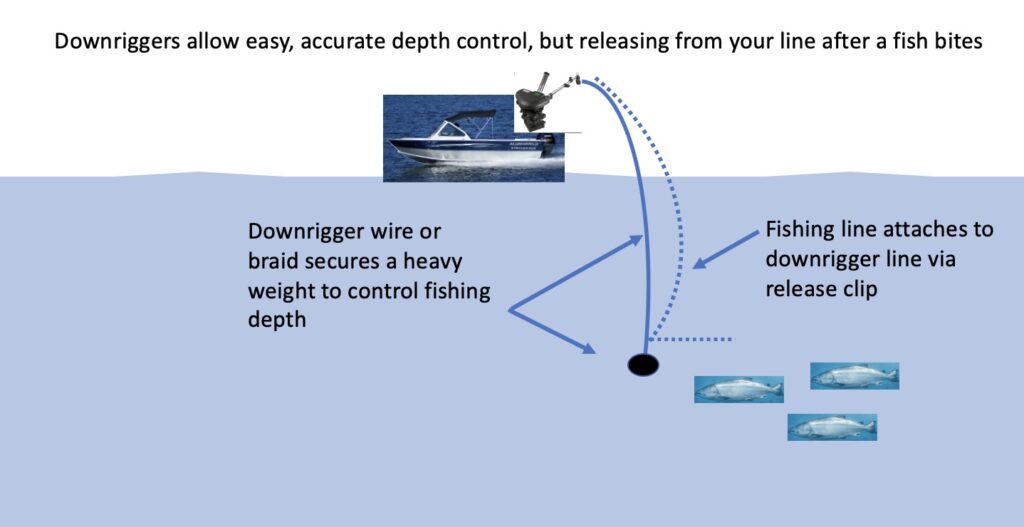
A downrigger is all about dropping your gear down with a very heavy weight (10-20 lb lead ball typically) attached to heavy duty braid or steel wire, and secured to your mainline by something called a release clip.
The release clip is what allows you to use a lighter rod when trolling for salmon with downriggers because when a salmon bites or enough tension occurs on the release clip, it will “release” the mainline it’s attached to, allowing the salmon to be battled unencumbered by the large weight.
The heavier the lead ball you use, the deeper in the water column you can troll. The smaller the diameter downrigger line you use, the less blowback or C shape your downrigger line will have as you fish deeper and troll faster for salmon.
So how do you use a downrigger to help you catch more salmon while trolling?
A downrigger allows you to effectively troll in the bottom 1/3rd of the water column at the trolling speed which provides enough movement/flash to your offering to trigger a bite and with a fishing rod that allows you to battle a salmon, once hooked in a way that is both more sport worthy (read fun!) and less likely to get off.
How to rig a downrigger for salmon fishing
There are several Amazon links to buy gear for downrigger fishing throughout this page. As an Amazon Associate, we earn from qualifying purchases you make via the below links.
Using the links below costs you nothing additional, but supports us continuing to put out quality content that hopefully helps you to enjoy the outdoors in the Pacific Northwest or wherever you are.
The High Performance Downrigger by Scotty is what I run on my boat. On my previous boat I ran the standard Electric Downrigger by Scotty.
If you want to run downrigger balls over 15 lbs, you should consider the high-performance model. Keep in mind you may need to use different downrigger terminal tackle (which we will discuss later) as the high-performance motor is incredibly powerful and can break some types of tackle.
I’m going to leave out of scope, for now, the topic of mounting a downrigger on a boat. I’m assuming you’ve purchased a boat with downriggers or have had a dealer install the downrigger mounts.
So let’s talk about how to rig a downrigger for catching salmon.
There are a few terminal pieces (some we’ve already discussed above) you will need to purchase and a few options on each of them to consider when rigging your downriggers for catching salmon.
Of course, the most popular (divisive?) rigging topic on downriggers is whether to go with braid or wire.
Braid vs Wire
Most downriggers will come with a steel cable as the default, but many folks end up switching over to braid eventually. I’ve researched this topic extensively to try and determine what’s best, but here are a few tradeoffs to consider.
- Steel will rust eventually and need to be replaced annually or every other year (depending on the quality of the cable) contrasted with braid that never needs to be replaced unless it’s weakened or frayed somehow
- There is an attraction or repulsion factor possible with steel because of how electric current is transmitted via the cable vs no benefit or detraction with braided lines. Check out my post on performing a downrigger voltage test to determine your electrical charge and how painting your downrigger balls can attract more fish.
- Steel cables will have a hum to them that may annoy you, compared to braid which is completely silent
- Commercial trollers tend to favor steel cable and use black boxes for positive ion control which helps attract salmon. Some downriggers also come with the black box feature.
- Braid offers a smaller diameter for comparable strength, so there can be significantly less blowback. Blowback is how far above your wire length your lead ball is actually fishing due to the resistance of the water against your cable and ball. Blowback gets worse the deeper you attempt to fish, the faster your troll or the lighter your lead ball is. This can be greatly reduced with braid.
Full disclosure: I have used steel cable for many years. My boat fishes for salmon just fine with it and I haven’t seen a need to switch until very recently.
My primary reason to switch is to fish much greater depths such as 300 ft and deeper in places like Westport. This also includes swapping the Scotty spool with a specially machined anodized aluminum spool for handling the pressure of deep water downrigger fishing.
Some good advice I once received was “If your boat fishes great with steel cable, why make a change?” and that was from someone who used braid.
I also use 15-20 lb downrigger balls if I want to fish deeper water to help reduce blowback.
If you do choose to stick with wire, there’s a good chance that the stock wire your Scotty downrigger comes with will begin to rust within a year and need to be replaced.
I’ve been running this downrigger steel wire for several years and I still don’t need to replace it!
Downrigger Release Clips
There are multiple options in terms of release clips.
This Scotty clip is by far the most popular option, but after running it for a season, I’m not a big fan. After only a season of use, one of these release clips started releasing lines with very light tension, making it essentially unusable.
I’ve since learned that the issue is related to the inside of the clip getting dirty, perhaps with a gel-based scent applied to lures, which creates an unfortunate lubrication situation.
Washing the clip thoroughly is one way to get back to the original performance.
I have had nothing but success with this style of release clip, but not many like to run it and I get weird looks sometimes when I’m twisting my line to put it into the clip.
Let me tell you though, it removes any kind of line diameter drama completely out of the mix.
I troll for smaller species like Trout and Kokanee as well, so sometimes I’m using smaller diameter lines and these clips are so easy to adjust with the tension screw.
You want a clip to hold your line and essentially require the combination of a fish biting and you reeling out ALL the slack to get it to release.
If your line releases without a salmon being present, you will quickly get annoyed at how much time you will waste not fishing.
If your line releases immediately when a salmon hits, and you aren’t immediately on top of that rod, reeling in the slack, there’s a good chance you will lose the salmon.
Here’s a couple of pictures illustrating what happens:
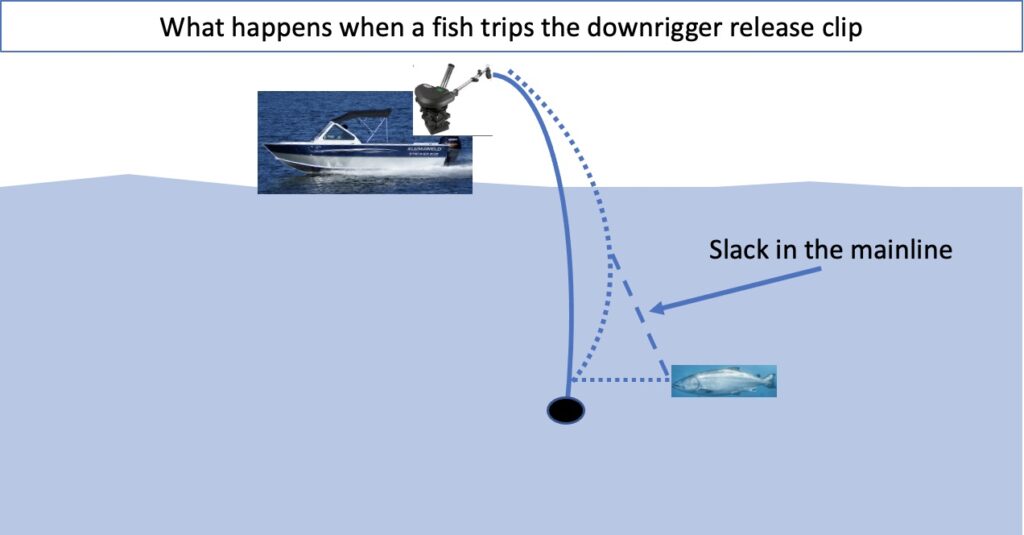
That split second (or seconds!) between when the release clip trips and the slack is removed via reeling like your life depended on it, is a common point when a thrashing salmon will come off the hook.
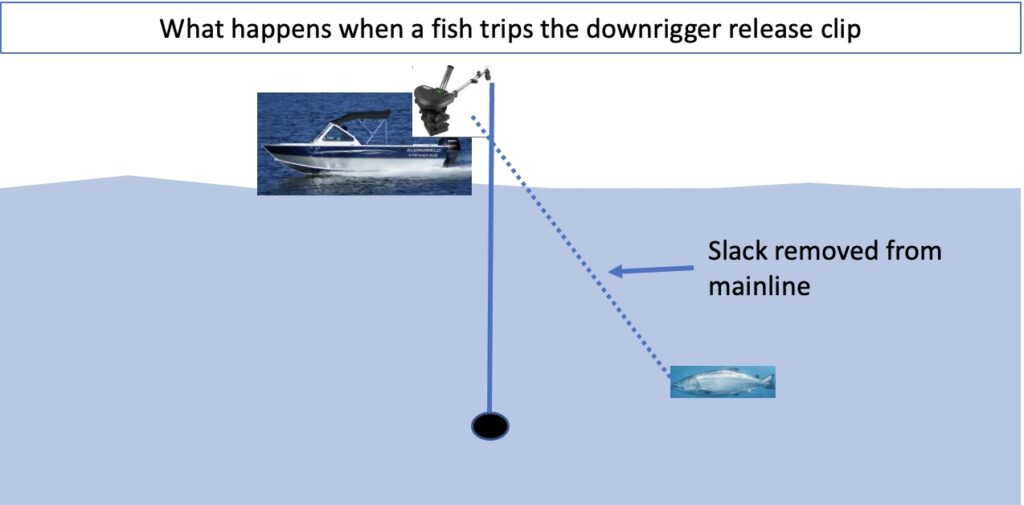
The best scenario is a tight release clip (easy to ensure this with the tension screw style) that gives you the opportunity to see the bite and immediately pick up the rod and reel out slack (causing the release to trip), making it much more likely that you will have a well-hooked fish.
Downrigger Ball
So many options are available in terms of downrigger balls, right? Which one is right for you?
If you are running wire, you may want to use a plastic coasted downrigger ball. I don’t want to deal with the voltage issue that can come up with exposed metal.
However, I now use exposed metal and just worry about the connection from my downrigger connecting hardware and the downrigger ball.
I also use a heavy-duty zip tie between my snaps and the ring on the top of the downrigger ball. Check out the downrigger voltage test for more background on this topic.
Some downrigger balls are shaped in more of a flat or pancake shape vs a ball. These are nice as they reduce blowback while trolling at faster speeds and have a smaller profile through the water.
You will pay a little more for these though, so you have to decide if it’s worth it to you. If you troll fast in really deep clear water, this might be a good option.
Downrigger Terminal Gear
The advantage of this rubber snubber is for situations where your downrigger ball gets caught on something near the bottom.
The snubber will stretch and create a lot of tension, allowing the potential for the ball to snap out of the snag and not cause you to lose all of your downrigger terminal gear, which can get expensive.
I love these Terminator kits from Cannon. Even though I run a Scotty downrigger, these terminator kits are perfectly compatible. I’ve had to redo my downrigger terminal gear on the water in the middle of a hot bite and it’s amazingly fast and efficient to switch everything out without doing any crimping.
Do not run these with the high-performance Scottys!
Since I switched to the Scotty Highpower downriggers though, I can no longer use the Cannon terminal kits I was raving about…If I (or one of my fishing buddies!) mistakenly retrieve the downrigger gear too far, the high-power model will break everything off.
It will even break the swivels in half in some cases.
The high power is nice for retrieving heavier balls like 18-20 lbs, but you better use the heavier-duty terminal tackle.
I also use two auto-stop beads to make sure it doesn’t go too far. Here’s the link for auto-stopper beads for braid. And here’s the link for wire auto-stopper beads.
In many situations, you are going to want to use this weight retriever on your Scotty downriggers when you are running a Scotty with an extended boom option.
Extending the boom will make it very challenging and potentially dangerous to retrieve your weight/release clip without this weight retriever.
Best fishing rod for downrigger fishing for salmon
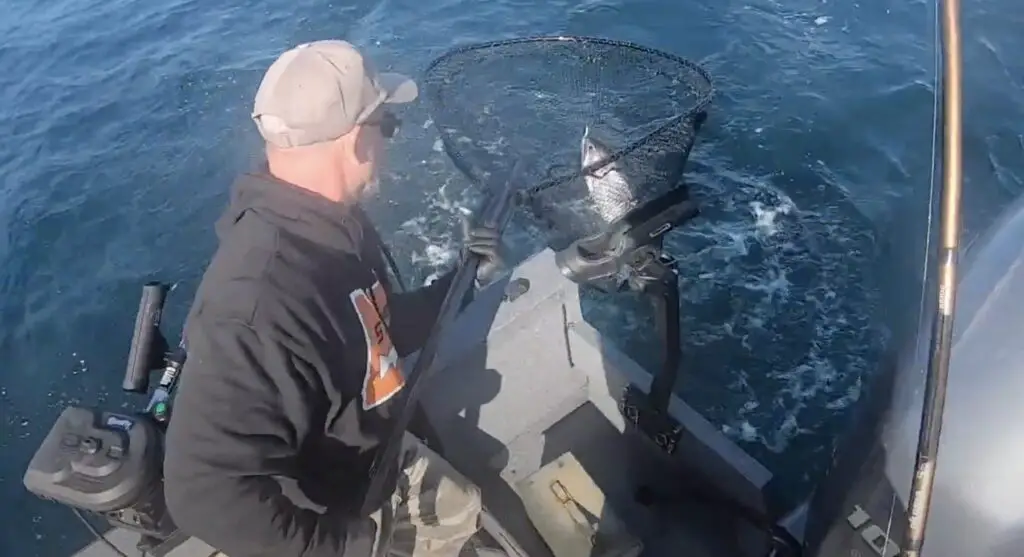
So, what is the best fishing rod to use for trolling for salmon with downriggers?
This is a question I often see. There are a number of factors here to consider, and I will break down exactly how I arrive at the best rod for downrigger fishing.
First, let’s just get one of the obvious factors out of the way: Don’t go and buy a 300+$ rod for trolling with downriggers.
Some may disagree here, but a downrigger rod takes some abuse. Starting with the fact that it’s constantly bent over in a rod holder with a heavy piece of lead holding it down.
Salmon boat rods in general get a lot of abuse. I fish for salmon on my boat about 50-70x per year and my friends break 1-2 rods every year.
I’m sure most of you are fine with this idea of not spending more money on a fishing rod, so we will keep moving the topic along.
Getting back to the idea that this rod is going to need to have a strong backbone and yet also slow enough action that allows it to form an easy upside-down C-shape in the rod holder.
You don’t want to take your stiffest rod out there as a downrigger rod as you want it to be able to handle a lot of pressure quite easily.
What about length? I generally default to longer rods. I know some aspects of downrigger fishing are easier with an 8-9 ft rod, but I prefer something longer for the versatility.
I want to be able to snap a mooching sinker on that setup with a 7 ft mooching leader and not worry about things. Or re-use these same rods in a river setup such as trolling for springers on the Columbia.
I also just like the way a longer slow action rod with a good backbone fights a big king salmon, I want my rod to have the strength to bury the hooks, but enough give to not allow a spasming chinook to shake off the barbless hook.
This Okuma 10’6 MH is my primary boat rod, it’s 99% of what clips into my downriggers and I will keep going with these as they offer everything I mentioned above at an exceptionally affordable price.
When it comes to selecting a level-wind reel, the retrieve rate is certainly a factor.
When a fish trips a downrigger release clip, it immediately creates an enormous amount of slack that must be rapidly taken up.
Additionally, fish are often lost as they race towards the boat faster than you can reel, creating slack and a chance to shake the barbless hook.
This Okuma Linecounter trolling reel is the reel I pair with the Okuma SST rod and it all works fantastic together and is quite affordable. And again, the line-counter adds versatility to the setup
How to downrigger fish for salmon
Watch this helpful instructional video created by the PNWBestLife team for tips on how to troll for salmon with downriggers.
For those who prefer to stay on the blog page, here’s the long-form rendition of how to use downriggers to fish for and catch salmon.
We’ve already covered rigging up your downriggers and all of the foundational concepts above, so let’s get straight to it.
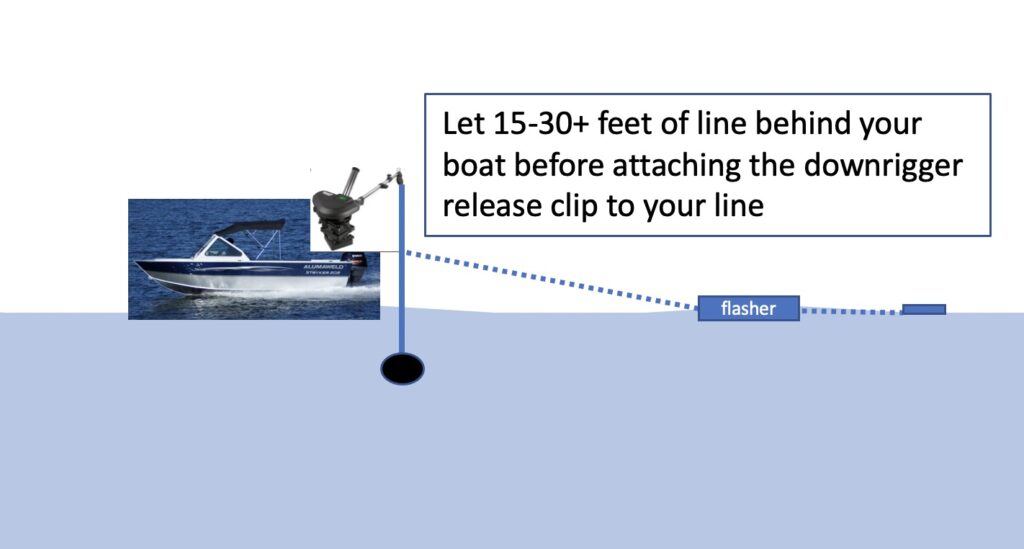
The first order of business is to release line from your reel behind the boat.
I generally let it out to about 15-30 ft behind the boat.
There are reasons to potentially go closer or further away. Keep in mind that your trolled offering will be that many feet behind your downrigger ball. In super clear conditions where fish are spooky, you may need to run further behind the boat.
In conditions that are potentially crowded with other boats or you may need to turn on a dime, having the clip attached closer to your boat may be preferred.
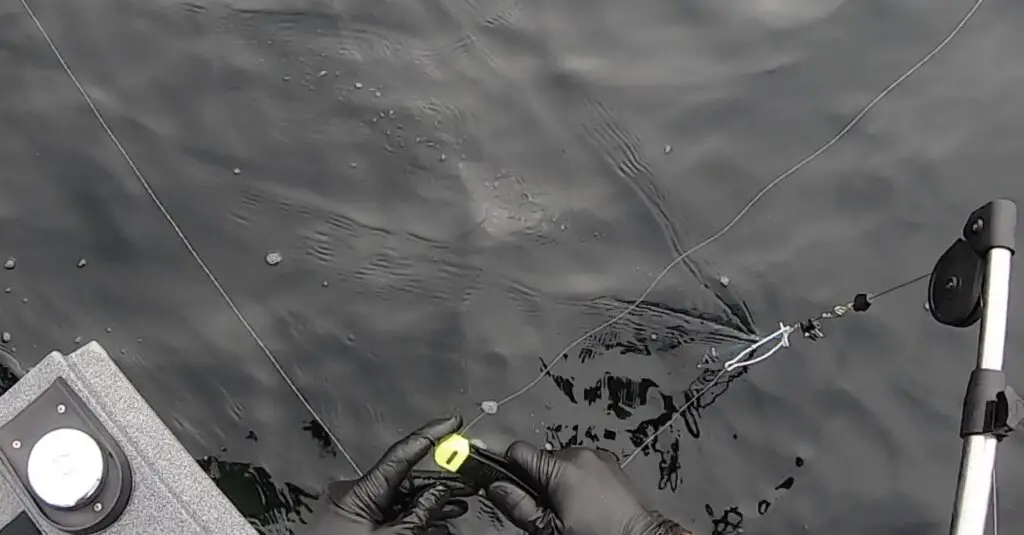
The second order of business is to actually attach your mainline to the downrigger release clip. How you do this is dependent on the type of release clip, but the idea is the same.
Now we are ready to lower the downrigger ball and thus our preferred offering attached to our mainline which is secured to the downrigger via the release clip.
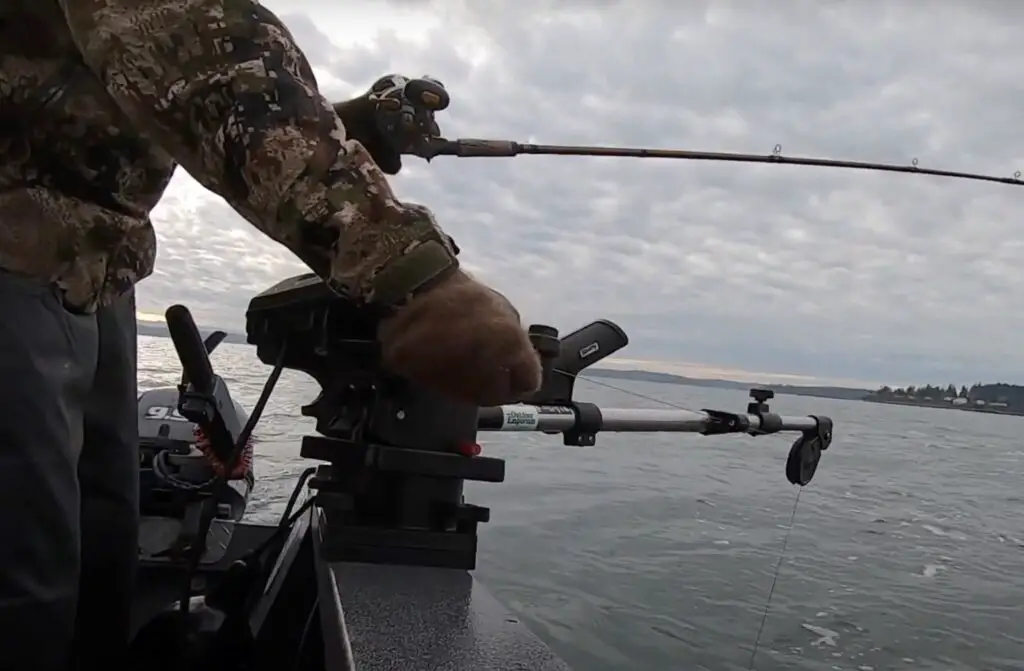
Releasing the brake on the downrigger is what gets the spool to begin to spin and the ball to begin to be lowered to the desired depth. Here’s the thing with how you do this.
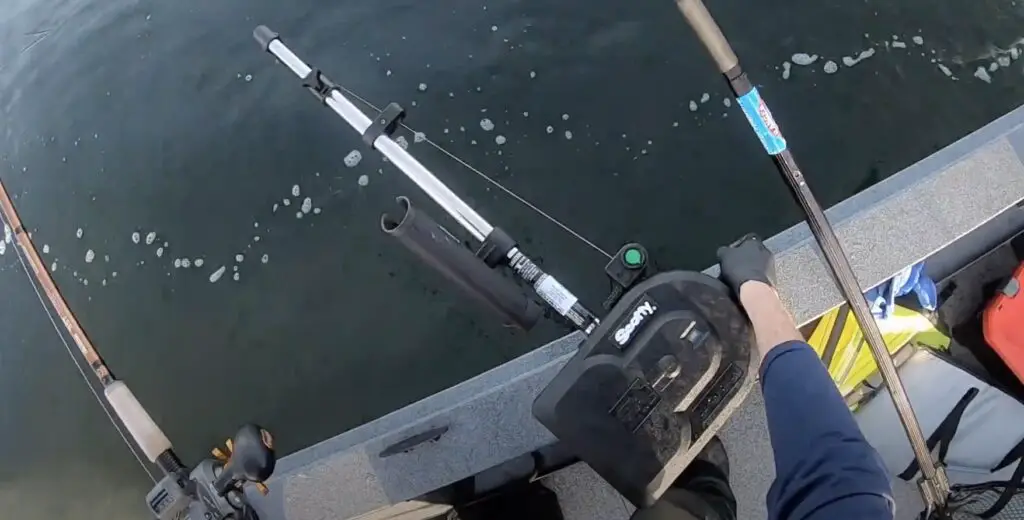
Hold the fishing rod in one hand with the drag released and hold the spool with your thumb.
Hold the downrigger brake with the other hand.
You want to simultaneously pull back on the brake while slightly relieving thumb pressure on the reel spool.
As you pull the brake back, the downrigger spool will begin to spin faster, so once it starts I generally back it off slightly to avoid dropping my gear too fast.
With your thumb on the reel spool, you want just enough pressure such that releasing the downrigger brake causes the lowered ball to pull the fishing line out at the same rate it pulls the downrigger wire out.
Too little thumb pressure and you will have a ton of slack to reel out when you get the ball to the desired depth. Too much thumb pressure and you may break your fishing rod with the force of the dropping ball.
This procedure is the toughest to master for those new to it, but everyone CAN do it, you just need to practice a little and be patient with yourself as you learn.
Once you get to the desired depth you can now troll for salmon. But first, you want to make sure enough slack has been removed. You also want your drag on your reel to be such that the line isn’t getting pulled out from the force of your trolling speed.
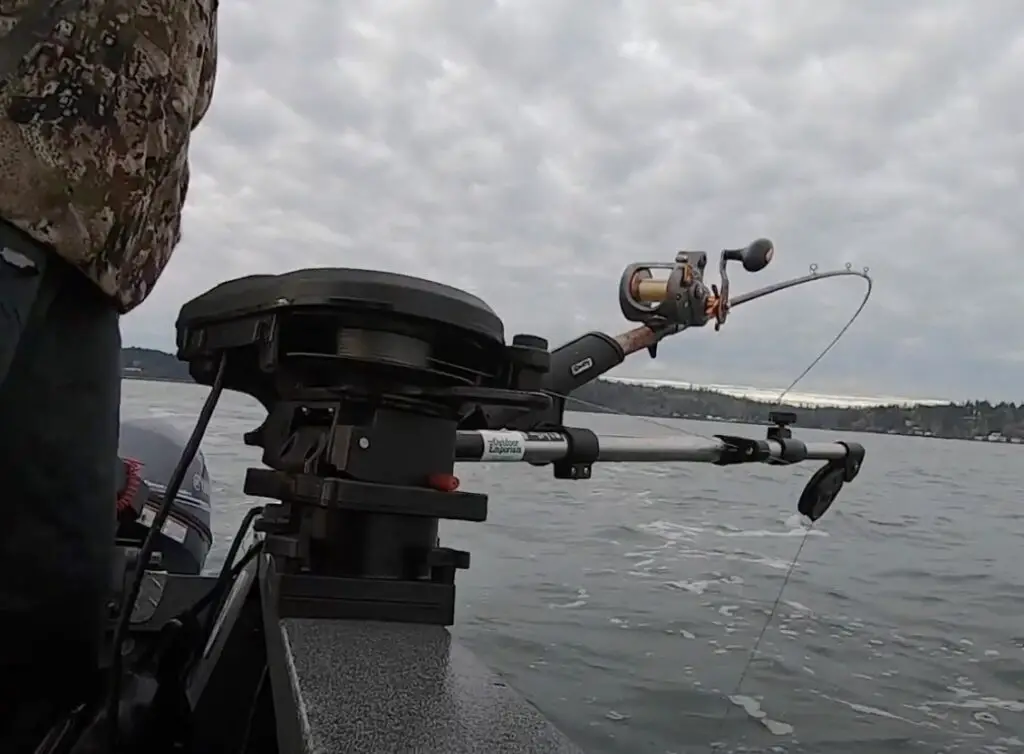
You want to reel out slack until your rod has a nice bend in it, pointing towards the water. Reel too much slack out and you may pop your release clip.
You may also need to pop your release clip. Reel too little slack out and…well we talked about this earlier, when a fish bites, you may lose it due to excessive slack between you and the fish.
When a salmon bites, you will see the tip of your rod start to erratically jerk and sometimes, may even be pulled free from the release clip (though not always).
Don’t assume that just because a fish didn’t pop the release clip it’s not a big salmon!
If the fish swims with the boat after it takes the offering, it won’t pop the clip.
Whether the salmon pops the clip or not, your first move is to reel out slack, even before you pick up the rod.
Picking up the rod is a bad habit of mine because it wastes precious seconds that could be spent reeling out slack.
Only after all slack is released do you even consider raising the tip in a hook-set fashion.
Be careful how hard you set the hook too…And don’t set the hook to break your mainline free from the downrigger clip (just reel!).
I’ve seen it happen twice on my boat when someone was using a violent hook-set motion to break the rod free of the clip when the release had already tripped, but the salmon was of such a nice size that they thought it was still attached to the clip.
What happened next is both sad and predictable: The mainline goes slack and they reel in nothing as they realize they just broke off a big fish by yanking on the rod cause they didn’t realize it was already off the clip.
That mistake will keep you up at night!
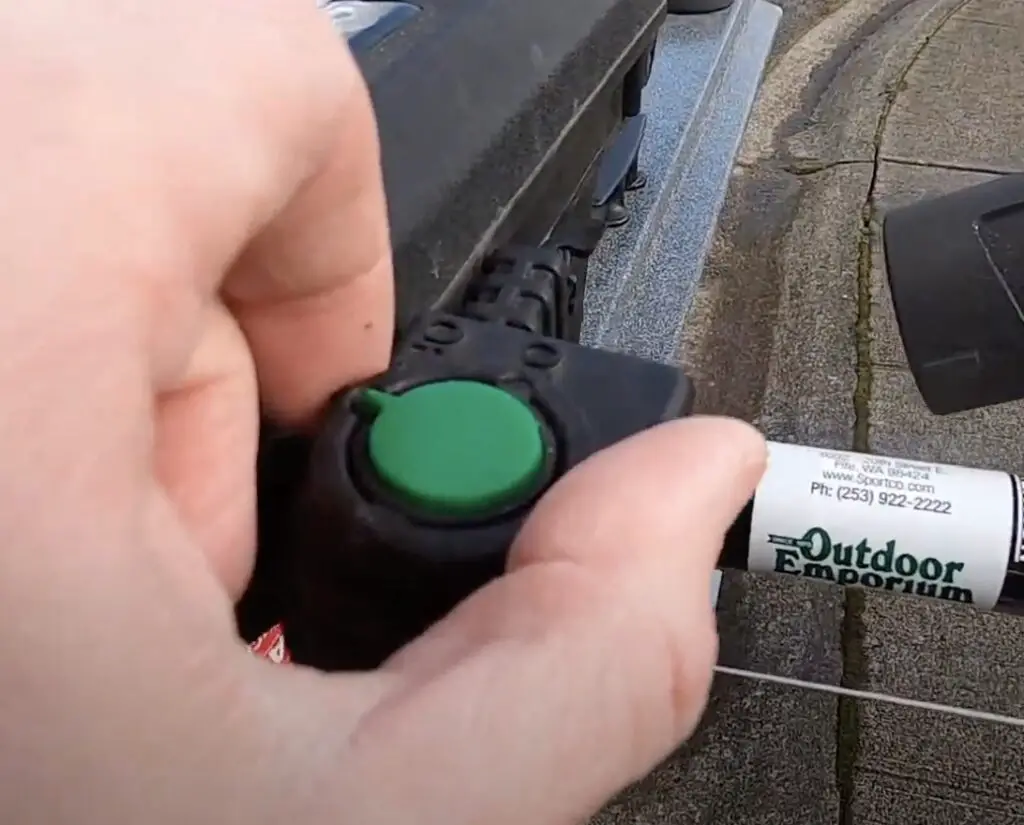
When you get the point where the salmon is firmly hooked, you want to reach over and set your downrigger gear to auto-up.
You may even want your partner to get your downrigger out of the water and for fighting a big king salmon, you may want all all rods and downrigger balls up.
I’ve had a king salmon take off right at the boat and trap the mainline against the rubber snubber causing the snubber to break, and the mainline to break losing both the downrigger ball and salmon!
Downrigger maintenance and repair
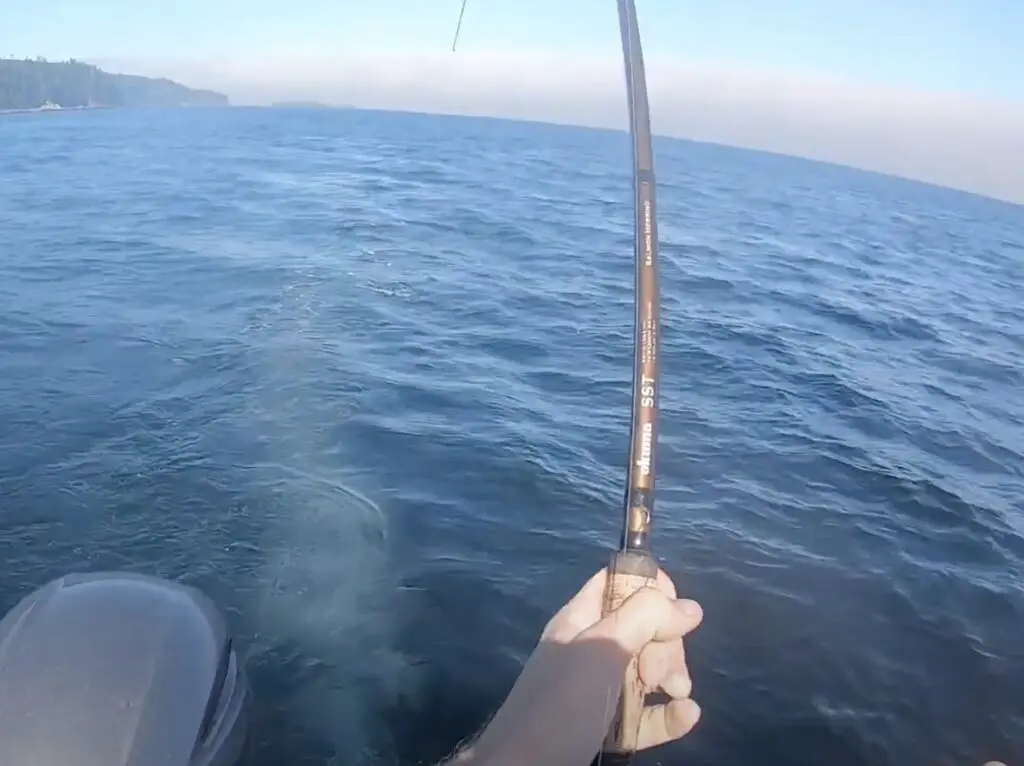
My downriggers get used 50-70x per year and I almost always need annual or every 2 years maintenance to keep them in good running condition. Here are a few of the items that wear down and what to do about them:
Downrigger brakes
Brakes are the key to the whole thing working! Your breaks will wear down over time, especially when using heavier lead balls.
I take mine in to get re-surfaced at Sportco in Fife, but any authorized service shop should be able to handle your needs.
Downrigger line counters
The line counters on your downriggers are easy to replace, but I had to order them from the authorized service center.
If you are choosing to run wire, you will have to replace that wire from time to time. Any signs of fraying or rust should prompt you to take care of it quickly.
You will also need to replace your auto-stop beads from time to time as they will go missing from your wire, or at the very least you may want to replace them when you replace your downrigger wire.
Wrapping up
Where should you go to utilize your new downrigger fishing prowess? How about the Puget Sound? Check out our page devoted to fishing for salmon in the Puget Sound to get started.
What else am I missing? Have a question related to downrigger fishing for salmon? Email me at kyle@pnwbestlife.com or drop it in the comments section below.
Also, feel free to subscribe to my YouTube channel “PNW Best Life”.