This comprehensive guide to razor clam digging will help you dig out limit after limit of these tasty coastal shellfish.
We will also include insights and tips on razor clam digging that you may not find other places to help cut your learning curve down.
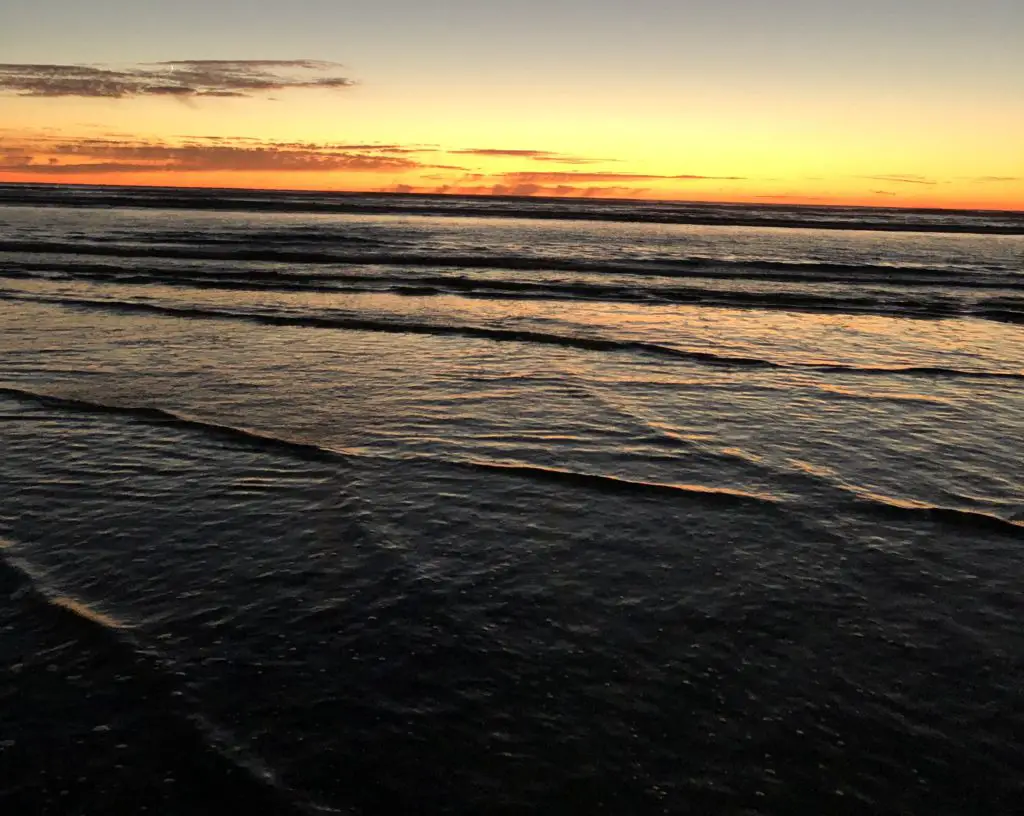
Razor clam digging is enjoyed by tens of thousands of people. There will be people on every beach you go to dig for razor clams, but don’t be intimidated by that.
Razor clam digging is one of the easiest and most accessible recreational harvest opportunities in the Pacific Northwest, which is why everyone is doing it!
Why not join all of us clam diggers for this amazing way to experience the outdoors?
How to get started razor clam digging?
The above video authored by WDFW provides a wealth of information to help you get started with. WDFW also maintains a one stop page for all the latest information on seasons and recently announced digs.
Razor clam digs get announced as biologists test for the presence of toxins on various beaches to determine that razor clams are safe to harvest.
WDFW will err on the side of safety, so you can rest assured that if a clam dig has been announced, the proper due diligence has been performed.
If you’re looking for recent information and updates on the razor clam season, the below blog articles could be what you’re after:
- Epic PNW Adventure for Salmon and Mushrooms October 2023
- Puget Sound Crab Season 2021
- RV Camping Ocean Shores August 2020
- RV Camping near Aberdeen WA
- What to wear digging for razor clams
Where to go razor clam digging?
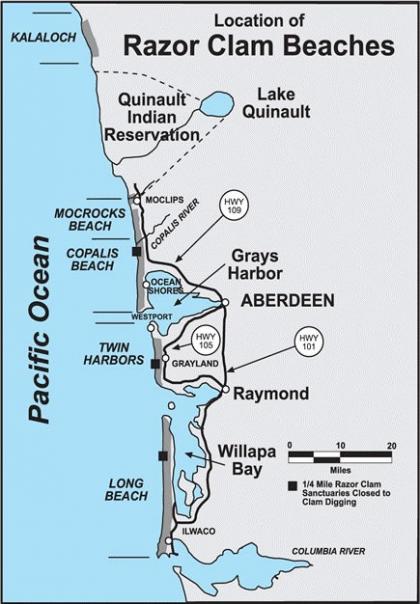
The above map will give you several choices of beach areas such as Kalaloch, Mocrocks, Copalis, Twin Harbors, and Long Beach.
I refer to these as beach areas, because there are several beaches within each area that can be accessed on different roads.
You can use Google Maps to easily find one of these roads, now that you know where to look.
How to “gear up” for a razor clam dig?
OK, so now we know about seasons, and roughly where to go…what the heck do we take with us on our clam-digging adventure?
I like to separate the packing list into a few categories: Gear for razor clam digging, creature comforts, and “nice to haves”.
Tools and gear for razor clam digging
This list is the technical side of things. Focussing on what we need to get the critters out of the ground and headed safely home with us for processing.
There are several Amazon links to buy gear for razor clam digging throughout this page.
As an Amazon Associate, we earn from qualifying purchases you make via the below links. Using the links below costs you nothing additional, but supports us continuing to put out quality content that hopefully helps you to enjoy the outdoors in the Pacific Northwest.
- Razor Clam gun or shovel:
- Or you could go with a razor clam shover such as this one by Danielson.
- Razor Clam net or individual container for each person to store their limit of clams in:
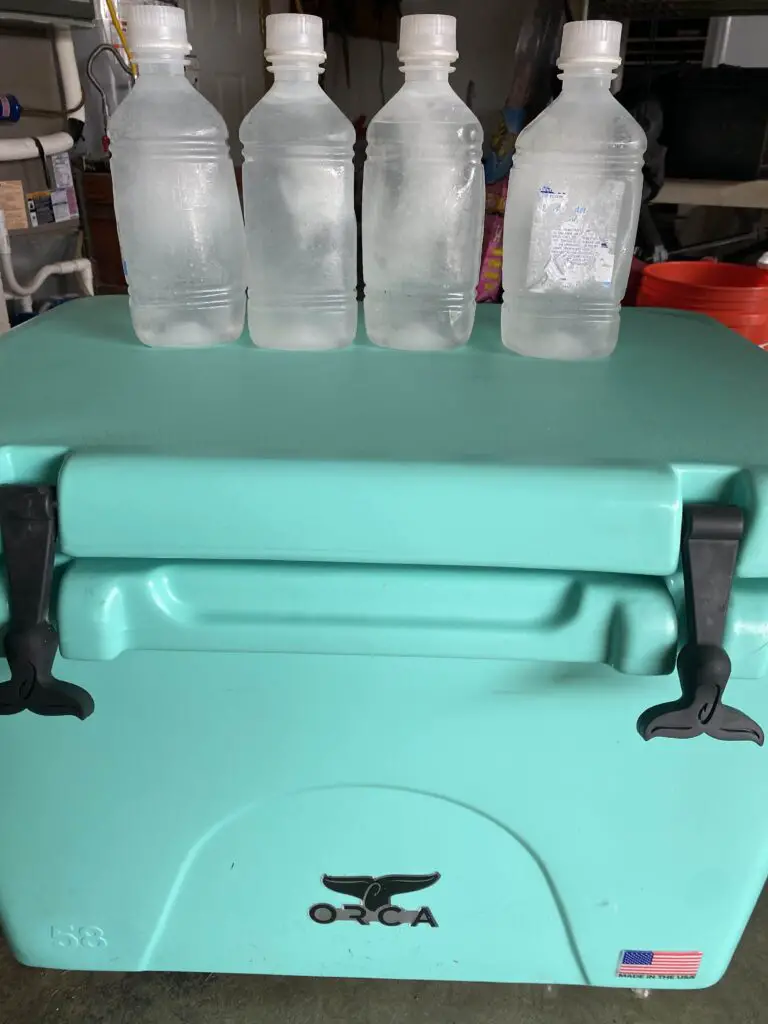
- Cooler with ice or frozen water bottles to keep razor clams dry and cool on the way back.
- Headlamp – oftentimes the best razor clam digging times take you into the night…there are no street lights on the beach!
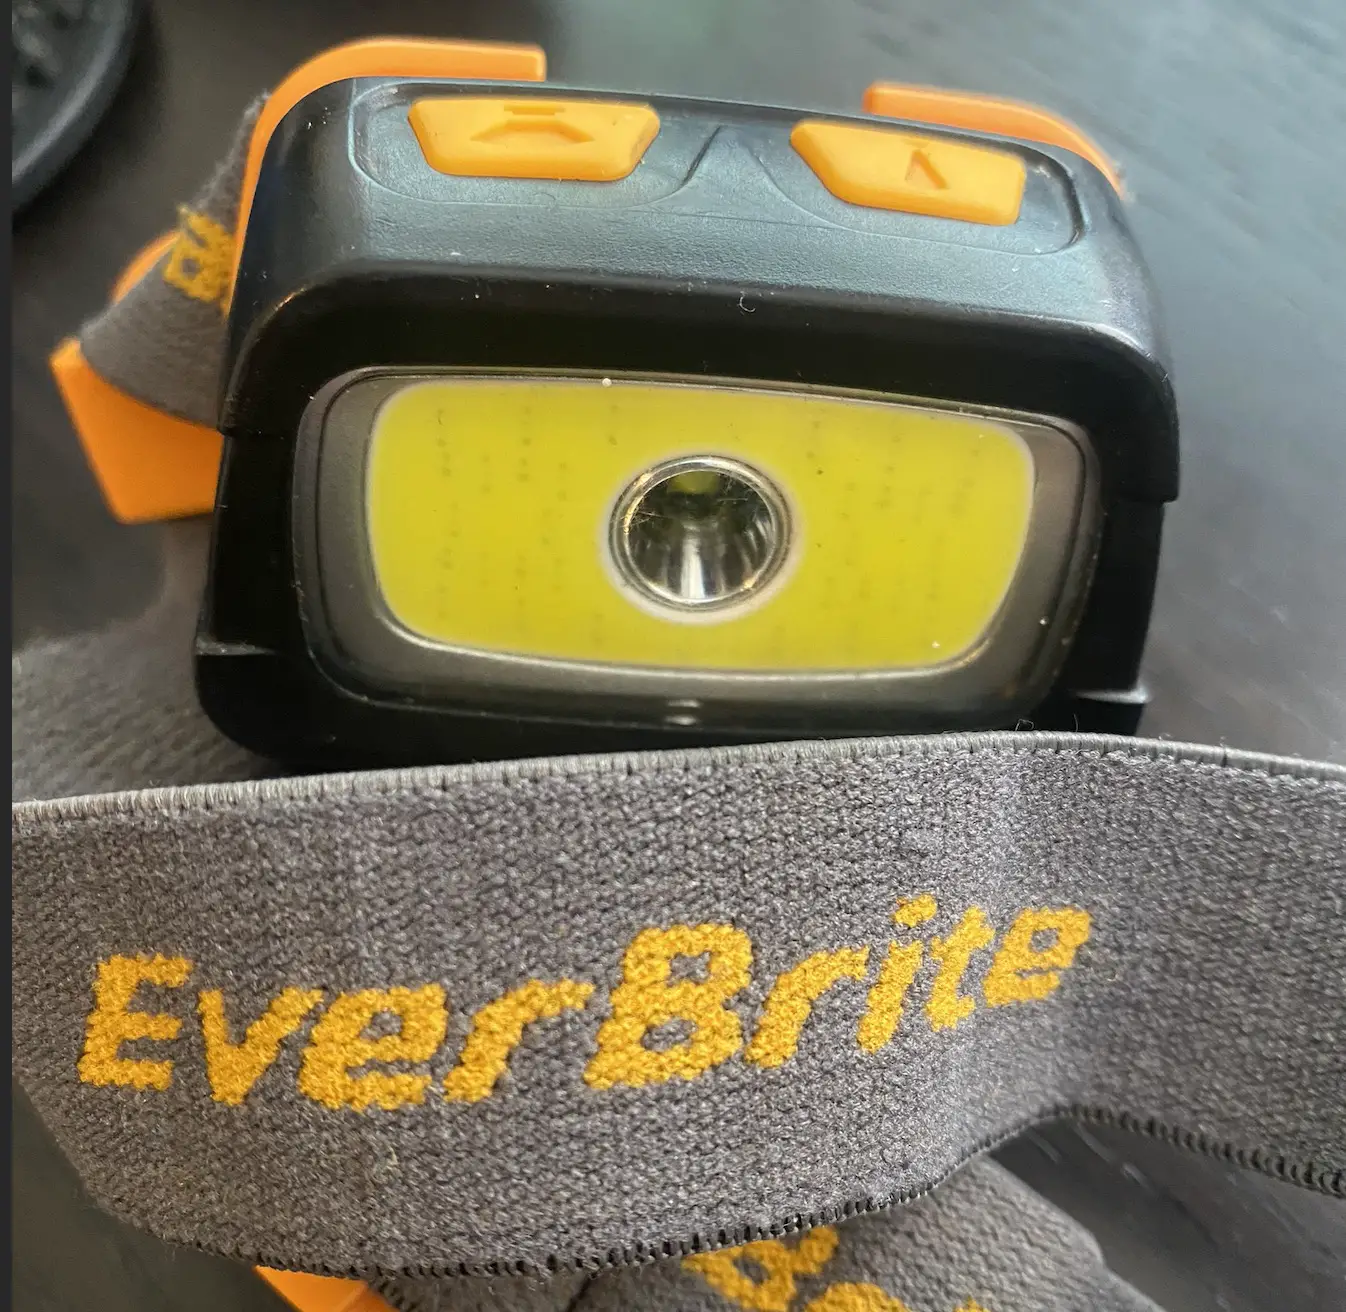
Long lasting, easy to recharge headlamp
- State state-provided shellfish license is required
Creature comforts for razor clam digging
It’s no secret, that razor clam digging seasons are not during the “warm months” of this here PNW.
To have a good time, you and your family need to be comfortable. You don’t want your first trip to be your last because your daughter (or son!) complained about being too cold the entire time!
- Layered clothing – while it’s generally less than 50 degrees during a dig, digging up clams can cause you to break a sweat. Don’t dress too warmly!
- Good moisture wicking base layer or athletic wear as your first layer
- Waterproof boots or waders
- Waterproof work gloves
- Hand warmers you can put inside your gloves
- Hats to cover your ears
- Rain gear
- Plastic bin or bags to hold all your sandy gear after a dig to save your vehicle from becoming a sandy mess.
Additional “nice to haves” out digging for razor clams
- Don’t forget to take a camera / phone to snap some pics and enjoy the beauty of the ocean beach experience. Or get that GoPro going and capture it all
- Take snacks and food to encourage your family after the limits of razor clams have been dug.
- Jetboil and supplies to provide a choice of tasty hot beverages after a dig – hot chocolate, cider or any number of the starbucks via coffees / latte / mocha mixes.
Planning a razor clam digging trip
To this point, we’ve only been providing useful background information to help get you started.
Some things to consider when planning the actual razor clam digging trip:
Check approved digs and tides to select the best day for clam digging
Below is a sample of previous digs we can use to discuss picking the best conditions to dig for clams:
- November 24, Sunday, 4:47 pm, -0.4 feet; Long Beach, Twin Harbors, Copalis
- November 25, Monday, 5:34 pm, -1.0 feet; Long Beach Twin Harbors, Mocrocks
- November 26, Tuesday, 6:18 pm, -1.3 feet; Long Beach, Twin Harbors, Copalis
- November 27, Wednesday, 7:02 pm, -1.4 feet; Long Beach, Twin Harbors, Mocrocks
- November 28, Thursday, 7:44 pm, -1.2 feet; Long Beach, Twin Harbors, Copalis
- November 29, Friday, 8:29 pm, -0.7 feet; Long Beach, Twin Harbors, Mocrocks
- November 30, Saturday, 9:10 pm, -0.2 feet; Long Beach, Twin Harbors, Copalis
In the above list, I’m going to be partial to the November 26-28th dates for the best clam digging. But why not hit Nov 30th on a Saturday? I’m focussing in on this text: –1.3 feet, -1.4 feet, etc.
This indicates how low the tide will be on that day and time. I want to plan my preferred clam dig dates around the lowest possible tides to ensure I have the conditions necessary to get me and my party their limits of clams.
The other dates can also produce limits of clams, but often times the abundance is not there further up the beach, especially as the season rolls on and these areas get “clammed out”.
There are a ton of clams lower down the beach in any tide less than -1.0 feet. You can also show up earlier before the actual low tide time and have easy digging right away.
For example: You may be able to show up on Wednesday, November 27th at 4:30 pm while it’s still light and finish digging limits of razor clams by 5:30 pm. Low tide is -1.4 ft at 7:02 pm on that day.
Some of the razor clam digs on those not-very-low tides will not be worth your time. I’ve met a few angry locals those days who wonder why WDFW even opens digs on certain popular beaches for a -.2 ft low tide.
Check the weather and especially the wind forecast before you go
Razor clam digging season is not only not during the warm months, it’s in the months when rain and wind are commonly present.
If you have your family in tow and you want them to have a great time, taking them out in great digging conditions for getting clams, but bad conditions for creature comfort, might not work out so well for you in the long run.
Any wind > 10 mph is going to cause some discomfort. 20 mph+ may not even be fun.
10 Mph winds are also quite common, so take a look at the forecast before you plan a razor-clam trip.
Not only will those winds make your family colder, but they will blow sand and rain (if present) into their face and potentially make them miserable.
If there is rain present, it will be important to pack a rain jacket / outer shell of some kind. Note the difference between “water resistant” and “waterproof”.
These are not the same things. A water-resistant jacket can soak through in minutes with a hard enough rain.
Consider spending a night or two to make the razor clamming trip the most enjoyable
For us Puget Sound area dwellers, driving out for a razor-clam dig is at least a 2-hour commute each way. When you get good at the clam digging part, driving 2 hours for a 30-minute dig to get your 15 clams, may not seem like the best return on investment in time.
While there are many other recreational activities to experience on the coast to make the razor clamming trip worth your time, another option is to stay a night or two to have the best experience possible and get in on multiple razor clam digs.
Check out our recent blog post on RV Camping as part of your razor clam digging experience.
And yes, your RV may be winterized already, but that shouldn’t stop you from dragging it out of storage to the coast for a dig.
I also like this blog post from the Washington State Parks Blog on potential places to camp in a state park.
And if camping is not your thing, there’s always the VRBO or hotel option.
Tips for digging up razor clams
Okay, we’ve provided you with lots of information to get you prepped for a razor clamming trip.
Now that you are steaming down the road with your family, with all the right gear, a perfect plan, and preparation…What do you do to get these critters from the sand into your clam nets?
Let’s start with not getting your vehicle stuck driving onto the beach
If you have not done much or any driving on the beach, this can sound intimidating.
Don’t let it be. While it’s always preferable to have a 4-wheel drive vehicle when going off of a paved road, it’s not required if you follow a few guidelines.
Let’s break the beach down into 3 areas:
- Dry sand at the highest point on the beach – This is where the water generally never reaches. This sand is deep, light, and will get almost any vehicle stuck in a heartbeat that doesn’t have not only 4-wheel drive but also the right tires for sand. Don’t drive here! There’s usually a small patch of this when going from the road to the beach. This area is also typically compacted by all the vehicle traffic. Stay on that compacted sand and don’t stop, to minimize your risk of getting stuck
- Wet sand which is just below the dry stuff, but not so near the edge of the water so as to be squishy – This is what you want to drive and park on. Just drive where everyone else is driving and parking and you will be fine. The wetness makes this sand like cement, but a bit softer, and is perfectly safe to drive on
- Wet squishy sand near the edge of the water – C’mon, just don’t drive on this. Nobody needs to make an urgent call for help because they got their vehicle stuck and the tides coming back in. Just don’t do it.
The last thing I will say is…don’t be that guy or gal who parks right on the transition point from the road to the beach.
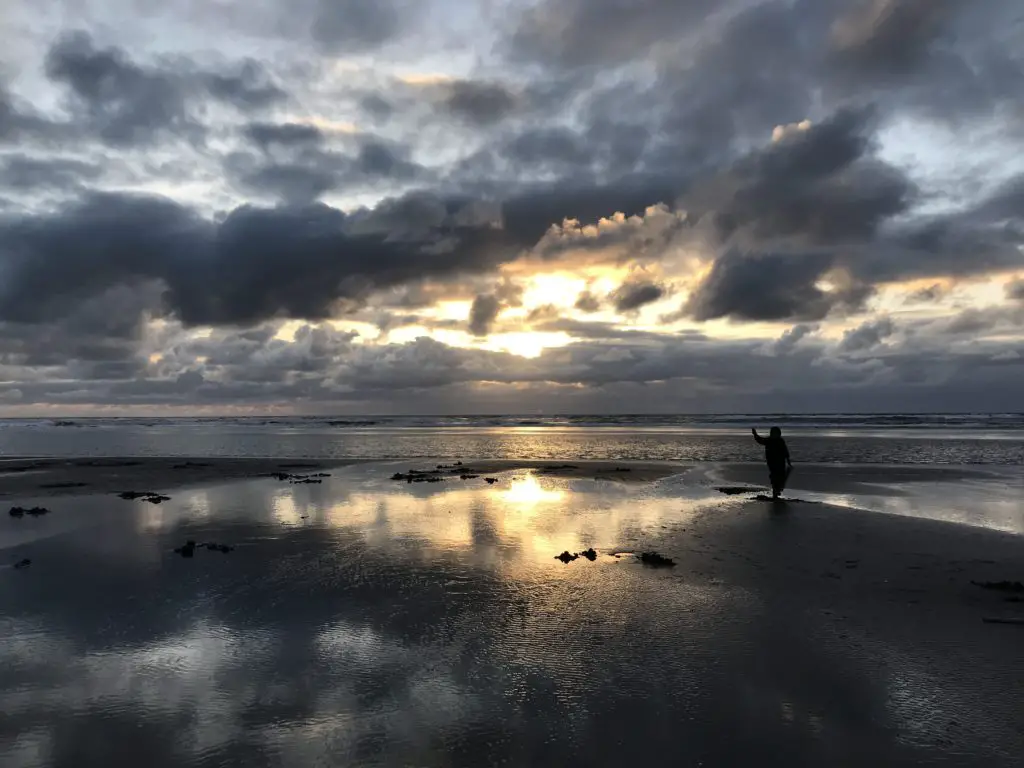
Walking towards the waters edge to dig up your limits of razor clams
Now you have safely parked and are walking down to dig up a limit of razor clams. But where the heck do you start digging? Let’s start with where not to dig.
Higher up on the beach, not far from where you parked, you will see dozens and hundreds of holes in tiny mounds in the sand. These are typically all sand shrimp. So don’t waste your time digging these up, unless you are going to do some fishing later on.
As you keep going, you will start to see the holes where other diggers, who arrived earlier than you, have already dug.
Oftentimes, most of the razor clam diggers will be low on the beach towards the water’s edge, following the tide out, looking for more clams to show.
Looking around these earlier dug clam holes can be a great place to start looking for razor clams. We’ve gotten entire limits easily when showing up later than most and just looking around those early holes for more razor clams.
A big reason for this is that clams will often be clustered together.
Where you find one, you will often find ten. When people in a digging party start to dig out a razor clam, they will often step on other razor clam’s “shows” or maybe dig out the three obvious shows they found and not completely search out the area for the other 5-6.
What does a razor clam “show” look like?
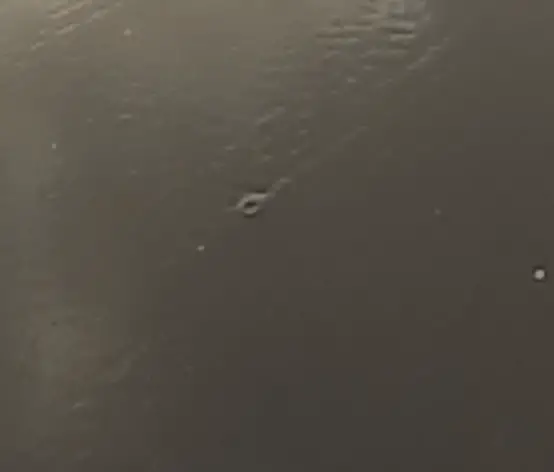
The above is a pretty obvious razor clam show, but they don’t all look that obvious.
Sometimes a razor clam show will be a subtle depression, other times just a small hole.
Sometimes, you are looking for a subtle shifting of the sand when you tap it with a stick or the handle of your shovel to indicate the show.
Here’s a big clue we’ve figured out though – The drier the sand, the easier it is to find a show.
If you are searching down by the edge of the tide, where the waves are washing over the sand every minute, it requires more skill to find the razor clam show.
If you walk up the beach, where the water no longer reaches, any movement by the clam in its hole will create an obvious show and it won’t disappear.
We often move in a zig zag pattern moving up and down the beach vertically and horizontally until we get our limits.
The above factor of finding razor clam shows is another prime reason to prefer the dates with lower tides.
The areas of the beach with the most clams will be dry and create super easy razor clam-finding conditions on low low tides.
Contrast that with a -.5 ft low tide and the areas with the most clams will be where the water is hitting every few minutes and which require more skills and experience.
How to dig out your clams now that you’ve found a razor clam show?
We prefer to use a clam gun as it’s the easiest way we’ve found to dig them out.
A clam gun is just a long PVC or metal tube with a big hole on the bottom and a small hole and a handle on the top. You can also use a clam shovel, but it requires a more advanced technique.
Position the clam gun around the show, stand facing the ocean, and push it down at a slight angle toward the ocean.
It’s important when pushing down to not cover the small hole on the top of the gun as this is where the air pushes out of as the tube goes into the sand.
You need the slight angle, because you don’t want to crack the easily breakable shell of the clam, and razor clams dig at an angle towards the ocean.
As you press down the tube into the sand, realize this is not so much a factor of raw strength. Give it a twist, wiggle, and shake to get the tube into the sand quickly and with little effort.
When coming back up, keep your thumb over the small hole on the top of the gun. This keeps the sand (and hopefully the clam) in your tube as you bring it up. Bend your knees, keep your core tight, and lift keeping your back straight.
Release your thumb on the small hole on the top of the gun away from the clam hole you just dug and the sand will come out.
You want to quickly sift the contents of what you just dug up to see if the clam is there. If not, immediately drop back into the hole to get deeper.
Sometimes, I will get the clam by burying the gun up to the handles. If that doesn’t work, give up and go to the next hole.
As you are digging and lifting. Pay attention to two things:
- As the tube is going down, listen for any crunching sound. If you didn’t angle your tube quite right, you could be crunching up against the clam and turning it into crab bait. Remember – all razor clams/fragments count towards your limit. So if you jack one up, it still counts! Stop putting pressure on the tube, remove the sand, and try again with a better angle to try to get a whole razor clam
- Look around as your tube is coming back up, you will often see holes appearing in the sand within a foot away from the show you are digging out. These are more razor-clam shows! Dig these next.
What if my kids or others in my party are not strong enough to dig for razor clams effectively?
Don’t let this stop you from taking them razor clamming. WDFW requires that for a razor clam to count towards someone’s limit, they have to participate in the dig somehow. You cannot just dig up their limit. Here are some ideas to help you:
- Have them carry their own clam net
- Let them use one of the handles on the clam gun and you use the other one
- Have them take the razor clam out of the hole or the sand you’ve removed that typically holds the razor clam
Limits of razor clams! Now what?
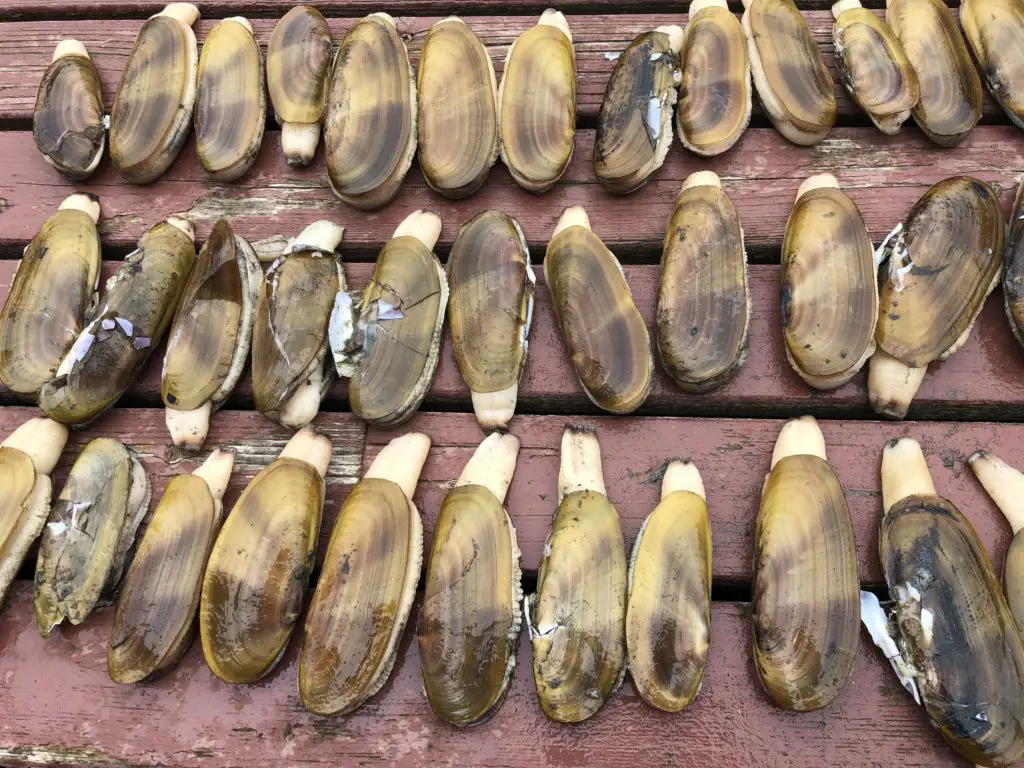
You and your party were able to dig up limits of razor clams. Congratulations! The work has only just started, you now get to clean and process them.
Safely transporting your razor clams
I like to freeze water bottles and use those instead of buying bags of ice. Not only is it cheaper, but you avoid puddling of melted ice which can kill/ruin your catch of razor clams, crabs, or shrimp.
I layer the bottom of a cooler with the frozen water bottles and then put the clam nets with the limits of razor clams in them on top and put them in the back of my vehicle.
I’ve kept razor clams alive this way for several hours without any issues.
Cleaning and processing your clams
I like this video of razor clam cleaning because it kind of shows it in two stages, which allows my wife and I to work the stages in parallel.
I will break the process down into 3 basic steps though. You will need to watch this video or one like it to have all the information you need. Once you get into a rhythm it’s easy to do dozens of razor clams pretty quickly.
1. Bring a pot of water to a boil. Submerge the live razor clams into the boiling water until the shell opens and then immediately remove the razor clam and submerge into ice water until the clam is cool to the touch. We want to make sure the razor clam shell opens in the boiling water (usually only takes 5-30 seconds) to confirm for us that the clam was alive prior to being boiled. Some of the razor clams you will take back will have damaged shells and many of these may be ok as long as the shell still opens. If the shells don’t open, they are crab bait or they are discarded.
On our recent RV camping trip to get razor clams we only completed step 1 and then refrigerated the dead, but not yet cleaned clams for 24-36 hours until we could get back and clean them properly with running water from our sink.
2. Use a pair of scissors to cut the razor clam open, per the above video, remove the gills and the stomach.
3. Take the partially cleaned and opened razor clams to the sink and rinse them with cold running water until all of the darker contents and sand have been removed.
You can do steps 2 and 3 on sort of an assembly line to go as fast as possible. You can even have two people doing step 2 to speed things up further. If you do it all by yourself, expect to take 2 minutes per clam. This means that for 100 clams, expect it to take you 3.5 hours at least!
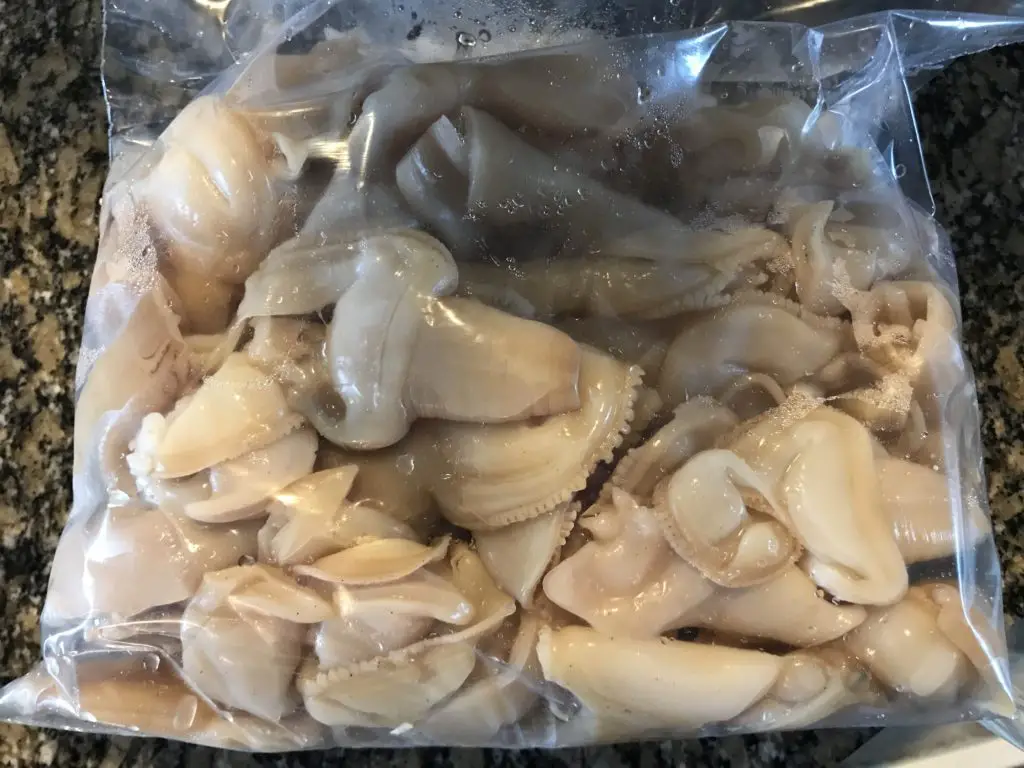
Freezing your excess razor clams
Oftentimes, we are processing and freezing our clams to enjoy all winter long. We will put say 20 of them in a plastic container that is meant for freezing.
Cover them with a little bit of water, leaving a little bit of room for expansion. Secure the lid on the container and then add them to your freezer.
The best ways to enjoy razor clams
Hopefully, you now have plenty of delicious razor clams ready to be cooked up or frozen for later use. So what to do with razor clams?
We will populate this section with some of our favorite recipes. For now, I will share two meals that I really enjoy:
- Fried razor clams – This is an instant classic!
- Razor clam chowder – Superb way to warm up on a cold fall or winter day.
I separate the digger & body into different container’s
The body is used for clam chowder, Manhatten or England
The digger is very tender; so I use a large flat pan, whip up some eggs, take a gallon zip lock bag, a rolling pin and grind up some ritz cracker. Dip clam digger in the egg, then sprinkle with ritz and put a few drops of butter on each clam, place on pan covered with parchment paper broil top rack in oven 3 minutes each side turn a little more ritz & butter do your 3 minutes time to eat
Oh man, that digger recipe sounds pretty epic! I gotta try it! I’ve got one more package of razor clams in my freezer.